Note, September 2022: This is an old project – from 2010, but variants of this stove and pot stand still serve me well on overnight trips over 10 years later. I also taught people how to make this stove at the very first EMF Camp. This is one of my favourite projects. I’m archiving the photos here, as I originally posted them on Flickr, back when that seemed like a good idea, and now seems less so…
The Caldera Cone is widely regarded as one of the best alcohol stove designs, combining windshield and pot stand in one piece, and reportedly being very efficient.
The following photos show my journey in roughly chronological order, designing and testing variants of stoves, windshields and pot supports.
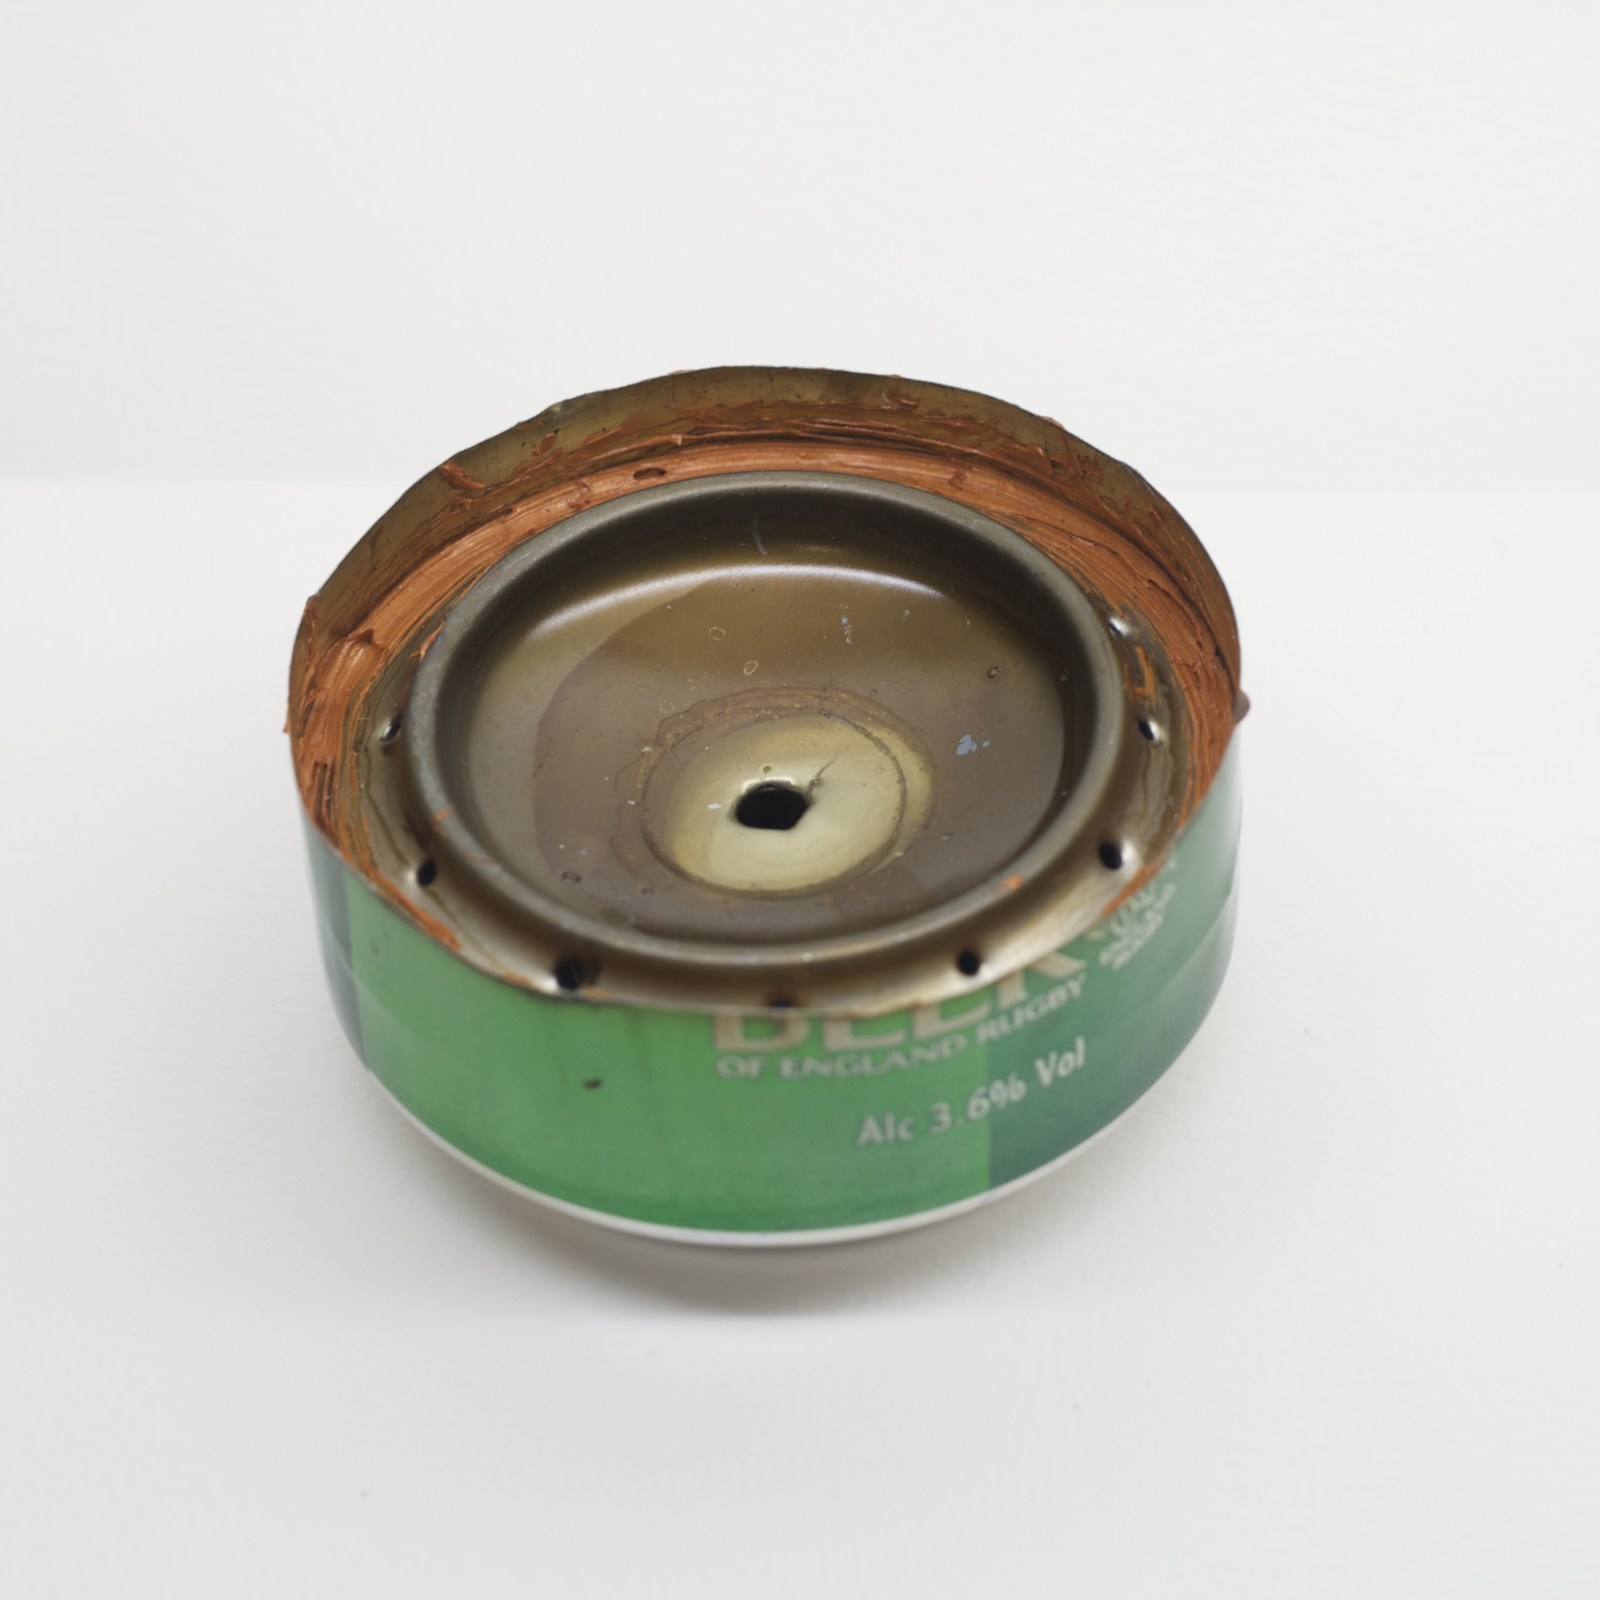
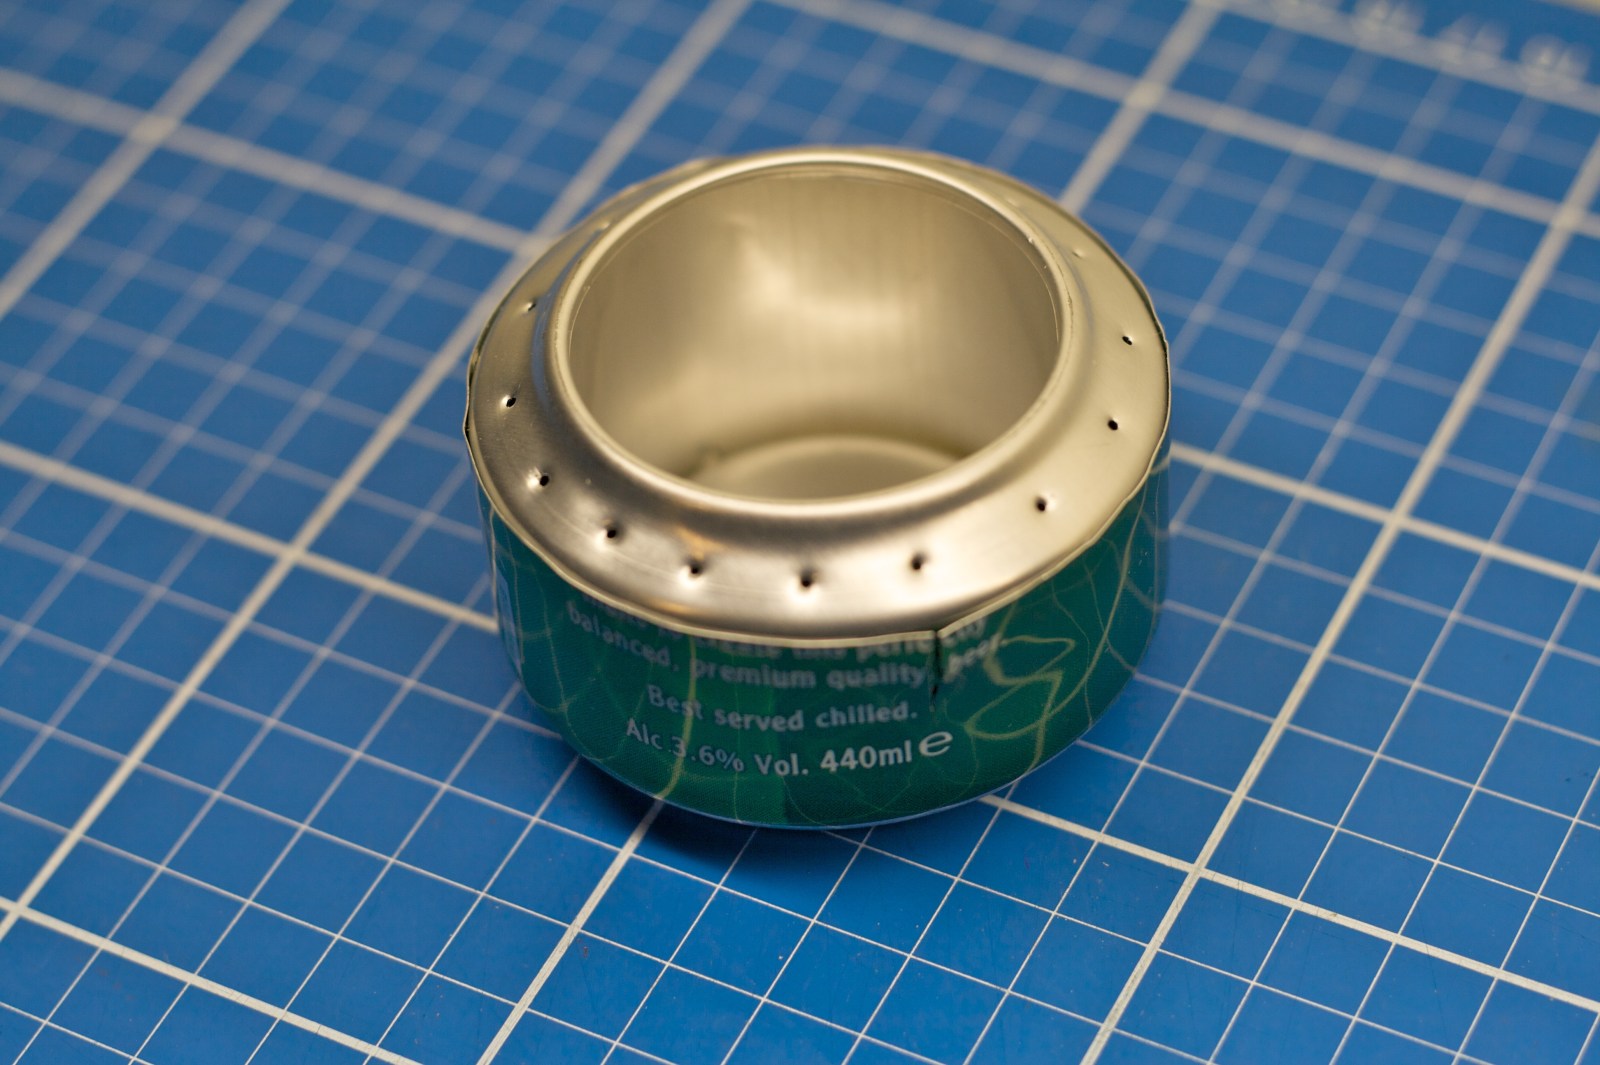
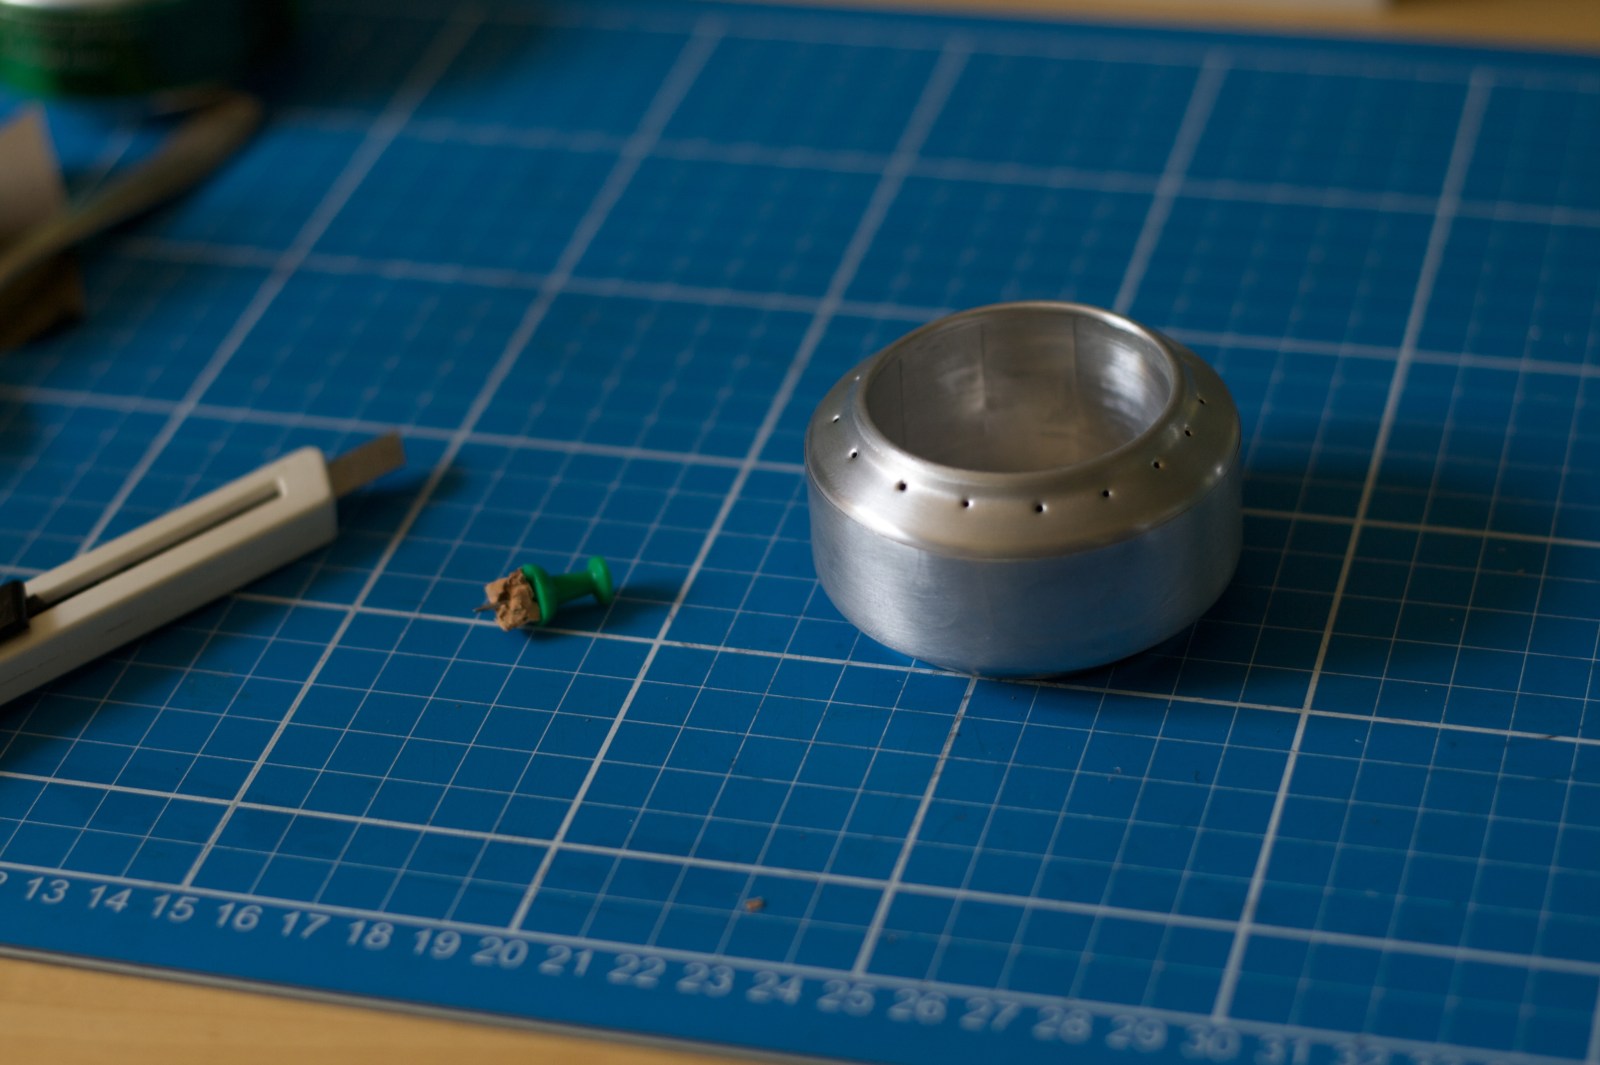
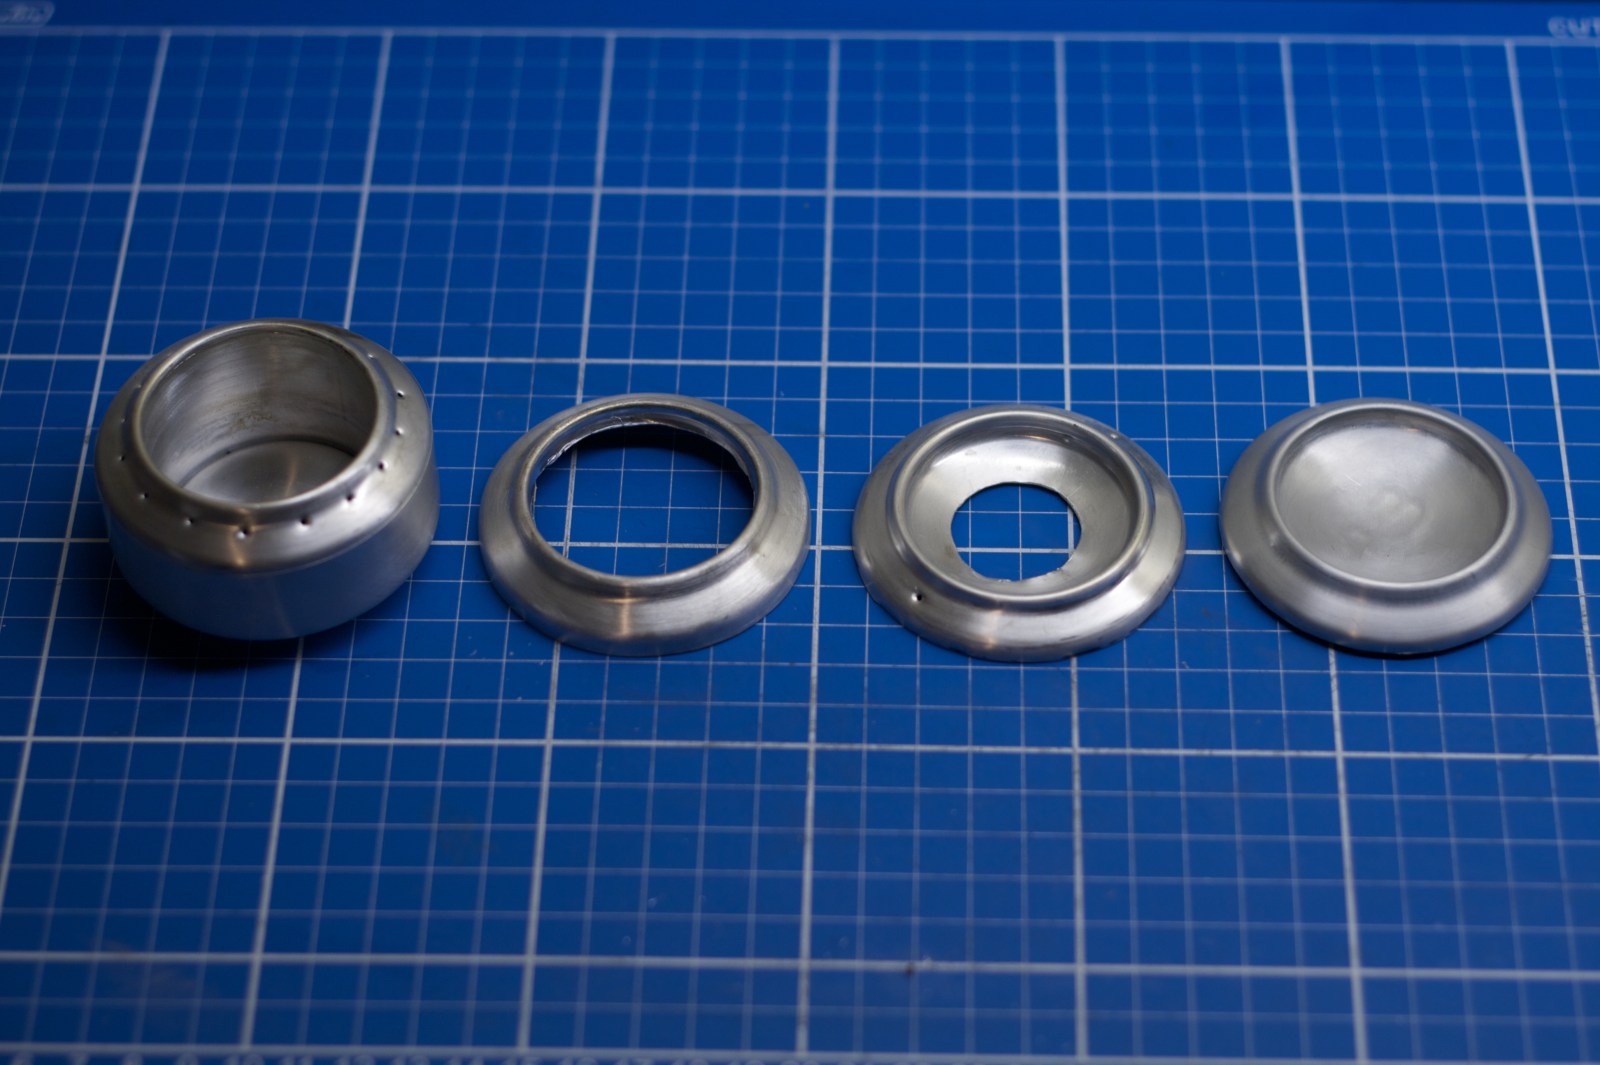
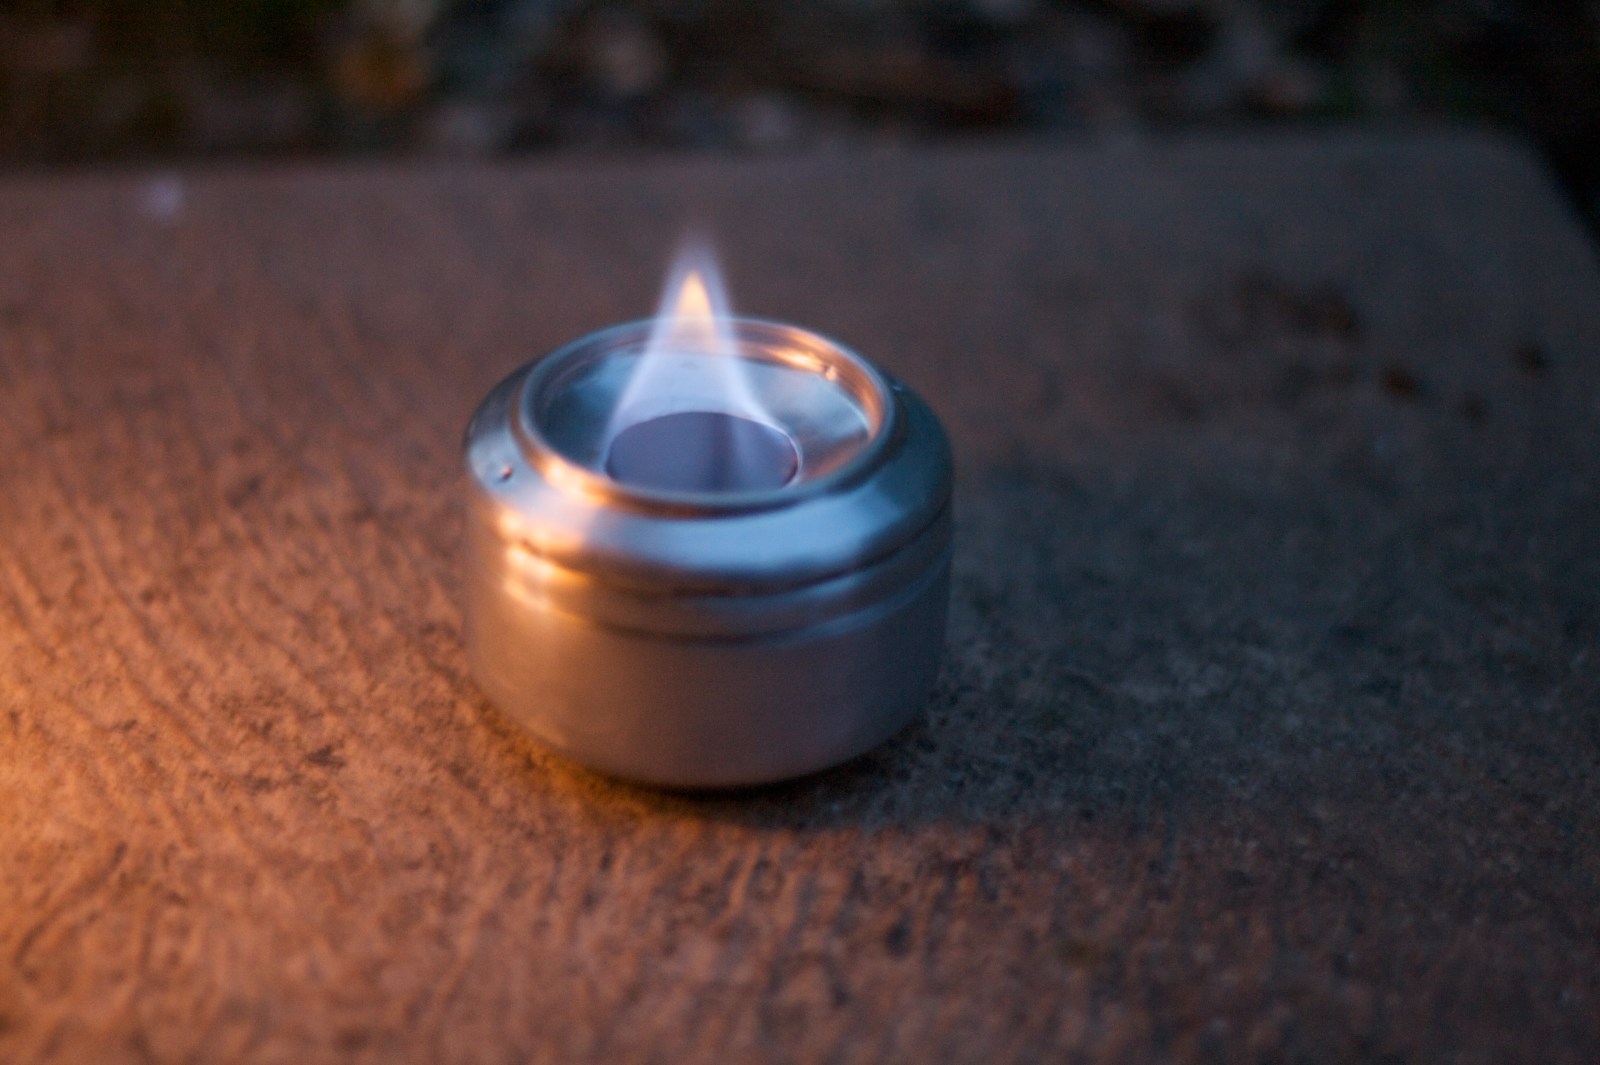
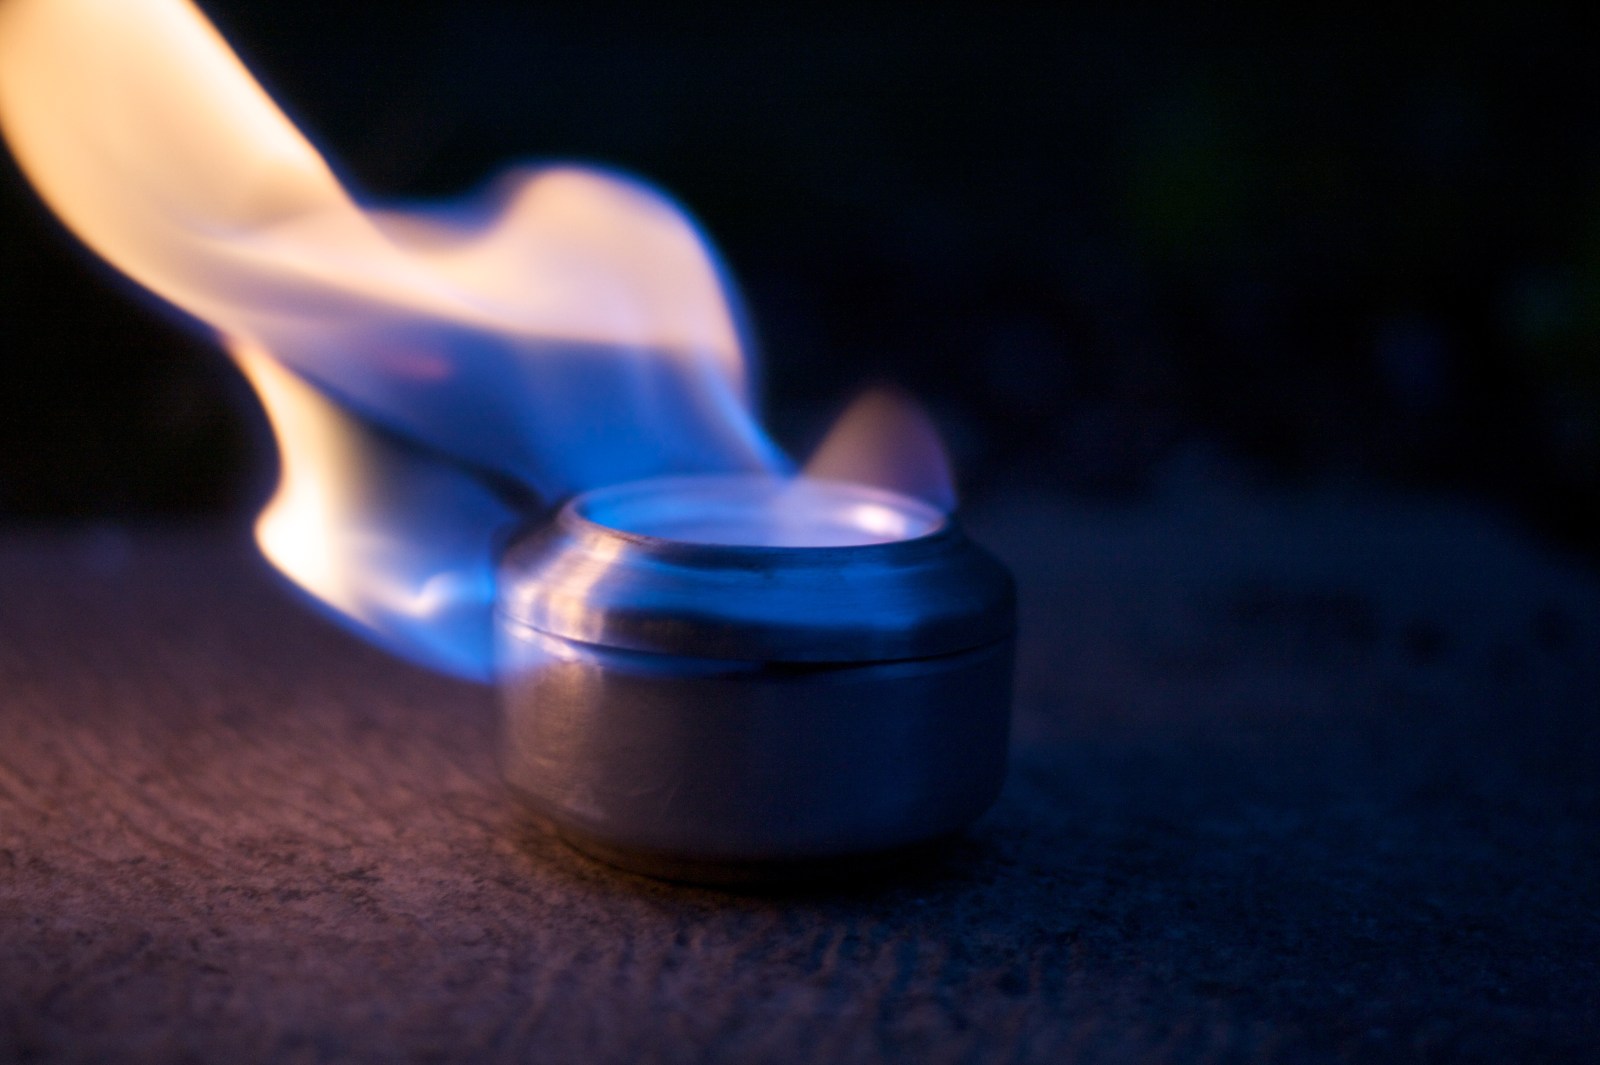
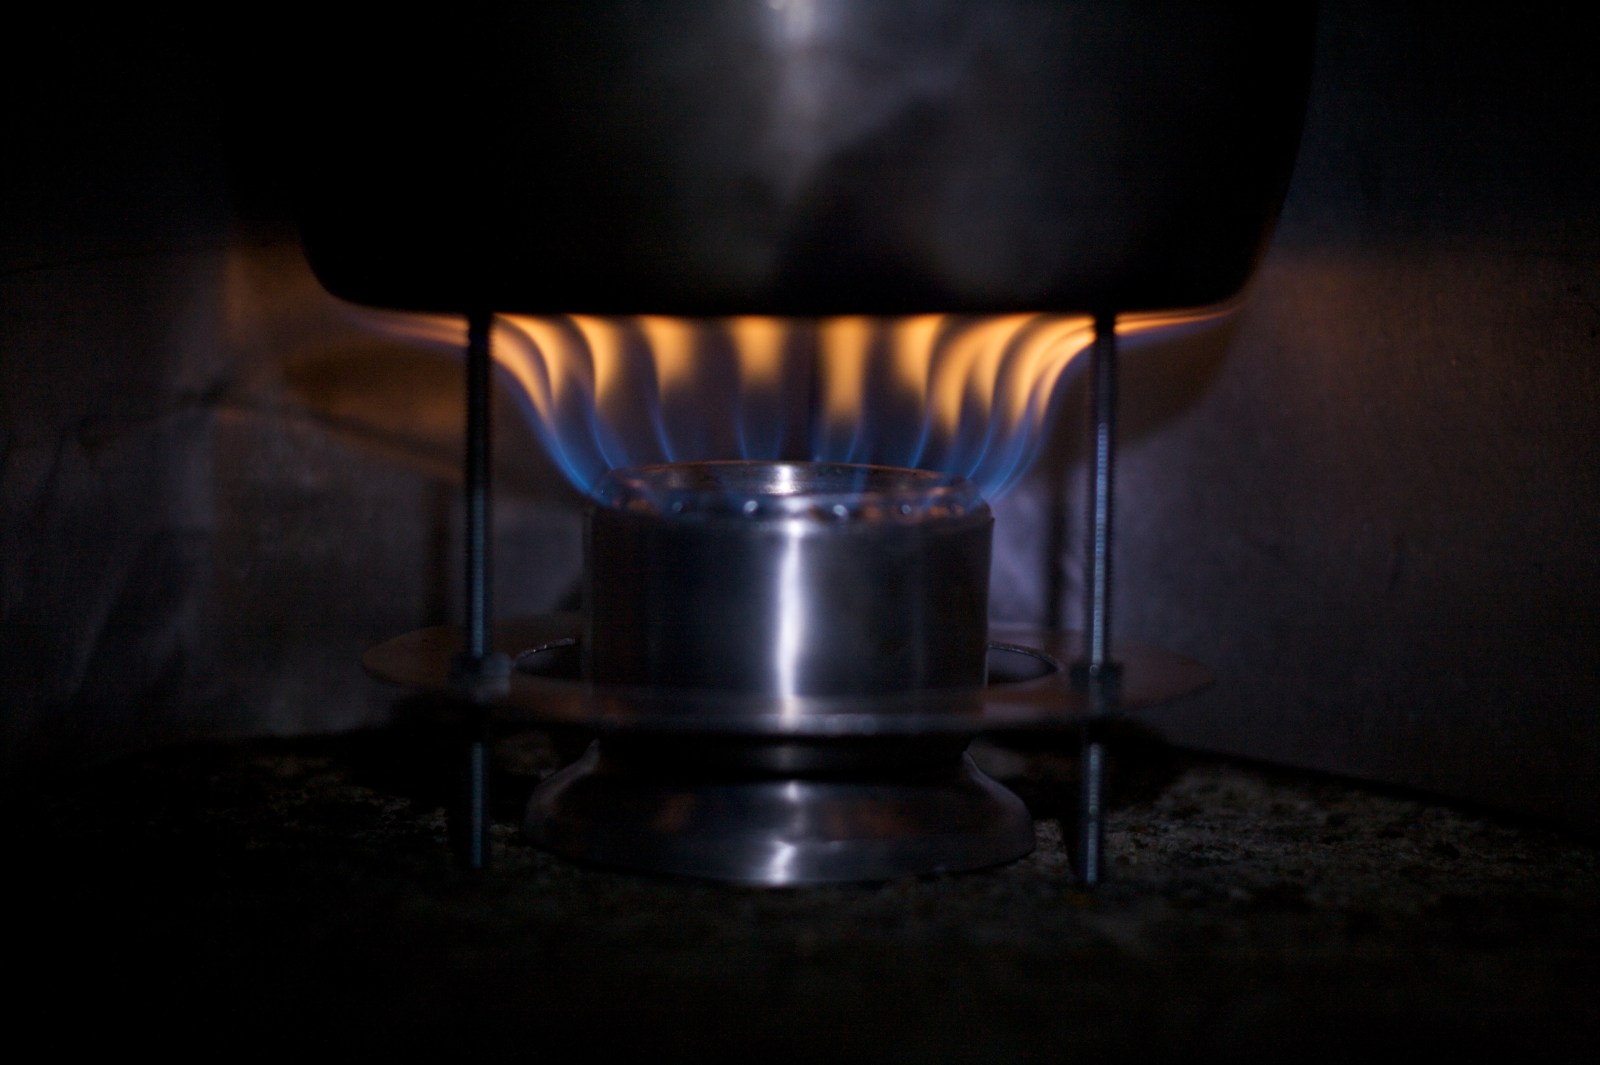
Testing the first penny stove prototype on the first prototype pot stand. Probably had very poor heat efficiency. There are no distinct jets coming from the holes in the burner; in this model, there was a poor seal between the two halves of the burner and vapourised alcohol was coming up through the gap. Clearly in need of a windshield.Even this simple windshield was an improvement.I sealed the two pieces with high-temperature gasket sealant. It works up to a point, although now this stove goes out too easily. I may need to play with the hole sizes, or maybe just use more meths.Prototype windshield made out of kitchen foil. The windshield isn’t bad, and is made as per these instructions: http://www.youtube.com/watch?v=NmO7ZRiZ5JA (but twice the height). The pot lid is rubbish and would blow away with the slightest breeze. I’m on the hunt for some heavier guage foil or flashing for both of these.The ring-and-bolt stand, Trangia burner, handle, foil lid and windshield. I’d be pretty confident taking this setup away for a weekend. It weighs about 320g, compared to about 680g for a stripped down Trangia setupThis is made according to the Captain Paranoia method detailed here: http://www.outdoorsmagic.com/gear-features/make-your-own-meths-burner/6227.html A much better design than the penny stove, more similar to a standard Trangia burner, and easier to use. The sticking point comes when you try to mate the two halves. In this case, the inner can buckled and tore the outer.The best flame pattern so far, but you can see where the gas is leaking out of the tear in the outer canV1 on the left, with the join – and tear – sealed with gasket sealant. I used only 8 holes on v2 and also managed to construct it much more cleanly. No tears or buckling.Much better flame pattern than all previous designs.I was very happy wi the second version of this stove, and just wanted to make a nicer looking one. Very easy to remove the paint with wet-and-dry when the beer cans are full. I can’t drink beer fast enough.All done. Reverted back to a 16 hole pattern on the theory that more holes mean shorter jets and hopefully a more efficient transfer of heat to the pan.Another excellent Captain Paranoia design, this time for a copy of Trail Designs’ Caldera Cone. Customisable template here:
http://www.outdoorsmagic.com/forum/forummessages/mps/UTN/22357/dt/4/URN/5/srchdte/0/cp/1/v/8/sp/
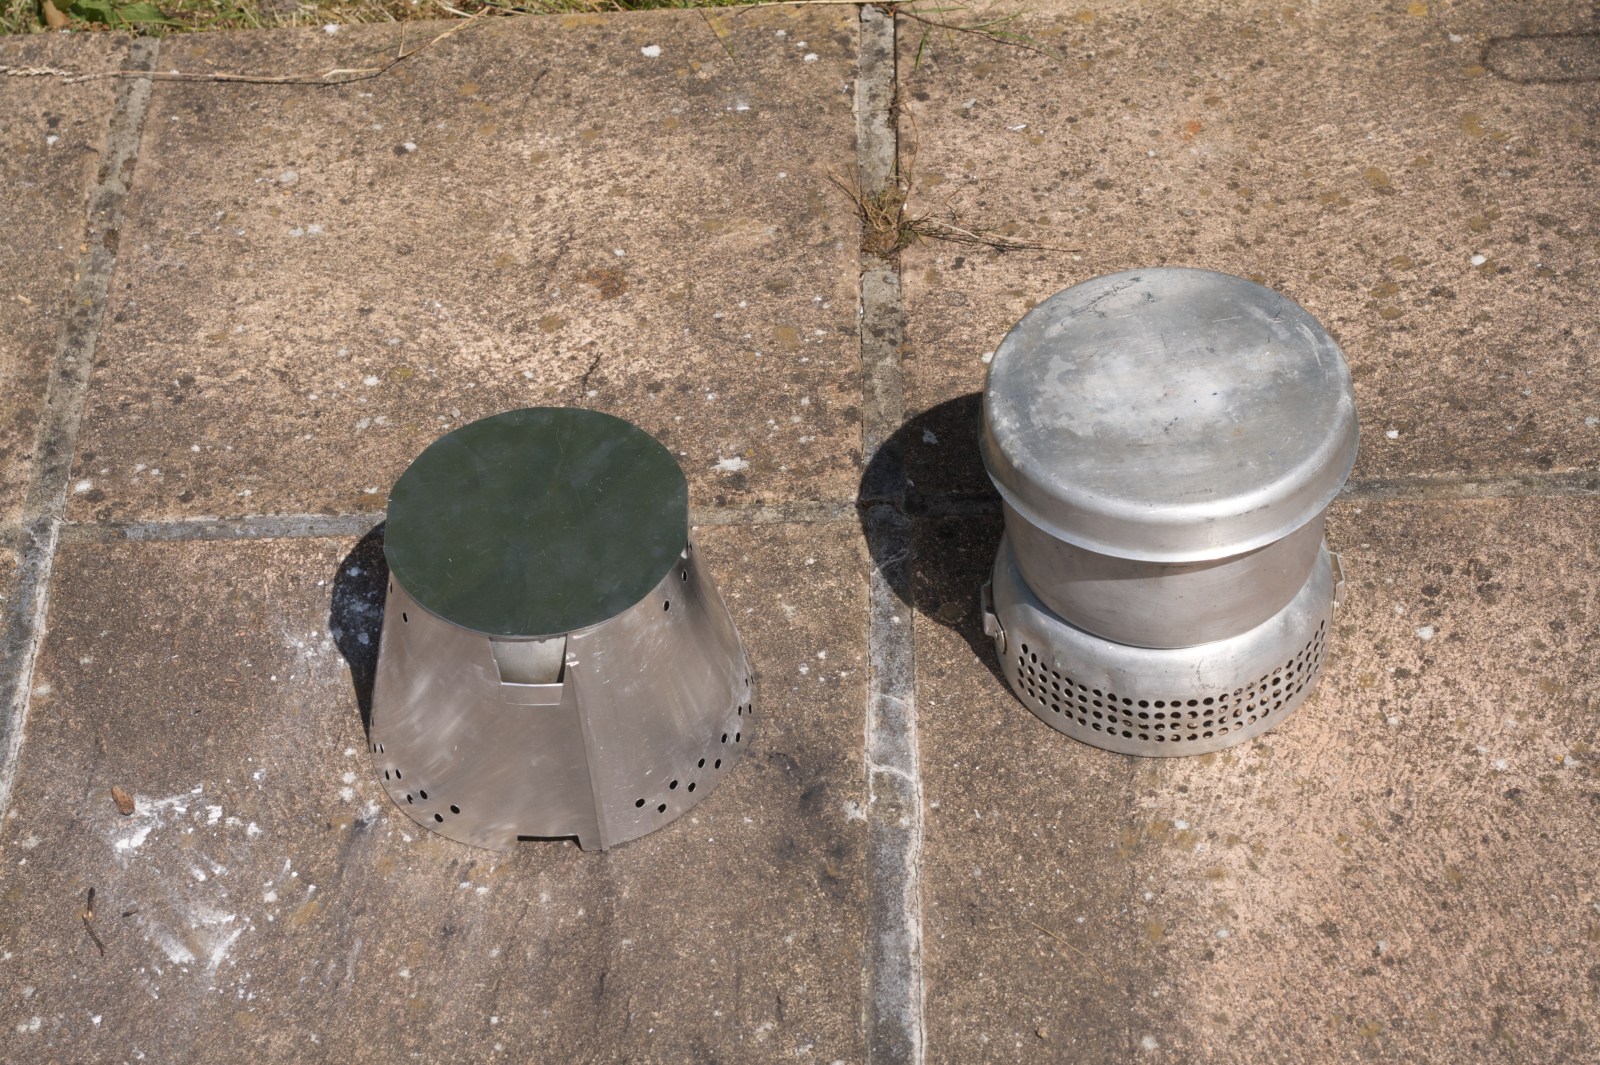
I went down this route as I needed to make a windhield anyway for the pot-stand. The cone deisgn, is just a much better use of materials – and weight.I sourced some 0.15mm guage aluminium from OM (thanks yonky) and this is my first attempt at making a Clone. I also have some 0.25 which I’m saving until I’ve had a chance to test this in the field.This is v1 of my Caldera Clone, complete with beer can burner (not visible), small Trangia pot and simple 0.15 aluminium lid.On the left my latest DIY setup. On the right a standard small Trangia kit. Both boiled the water in about the same time, but the DIY rig was much more efficient, using about 15ml meths to boil 300ml water, compared to 25ml for the Trangia.This gives me 4 ‘heat settings’ from full blast, through to slightly leaky central flame, to small central flame only, to snuffed out.
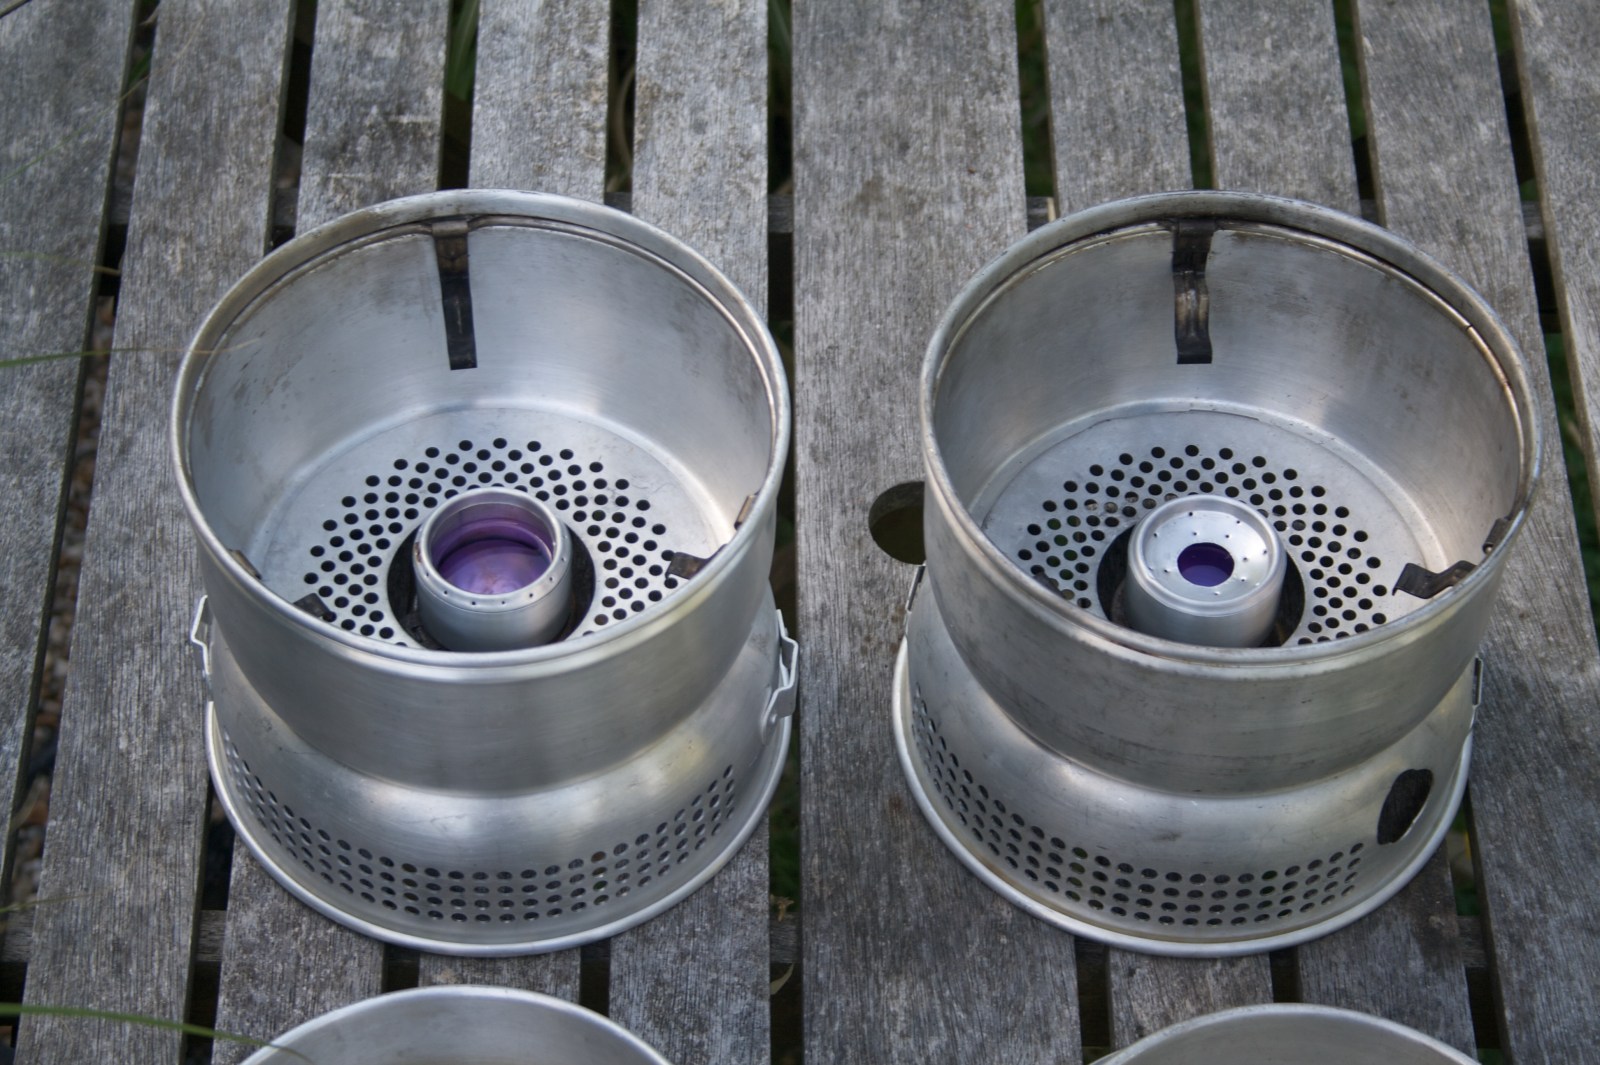
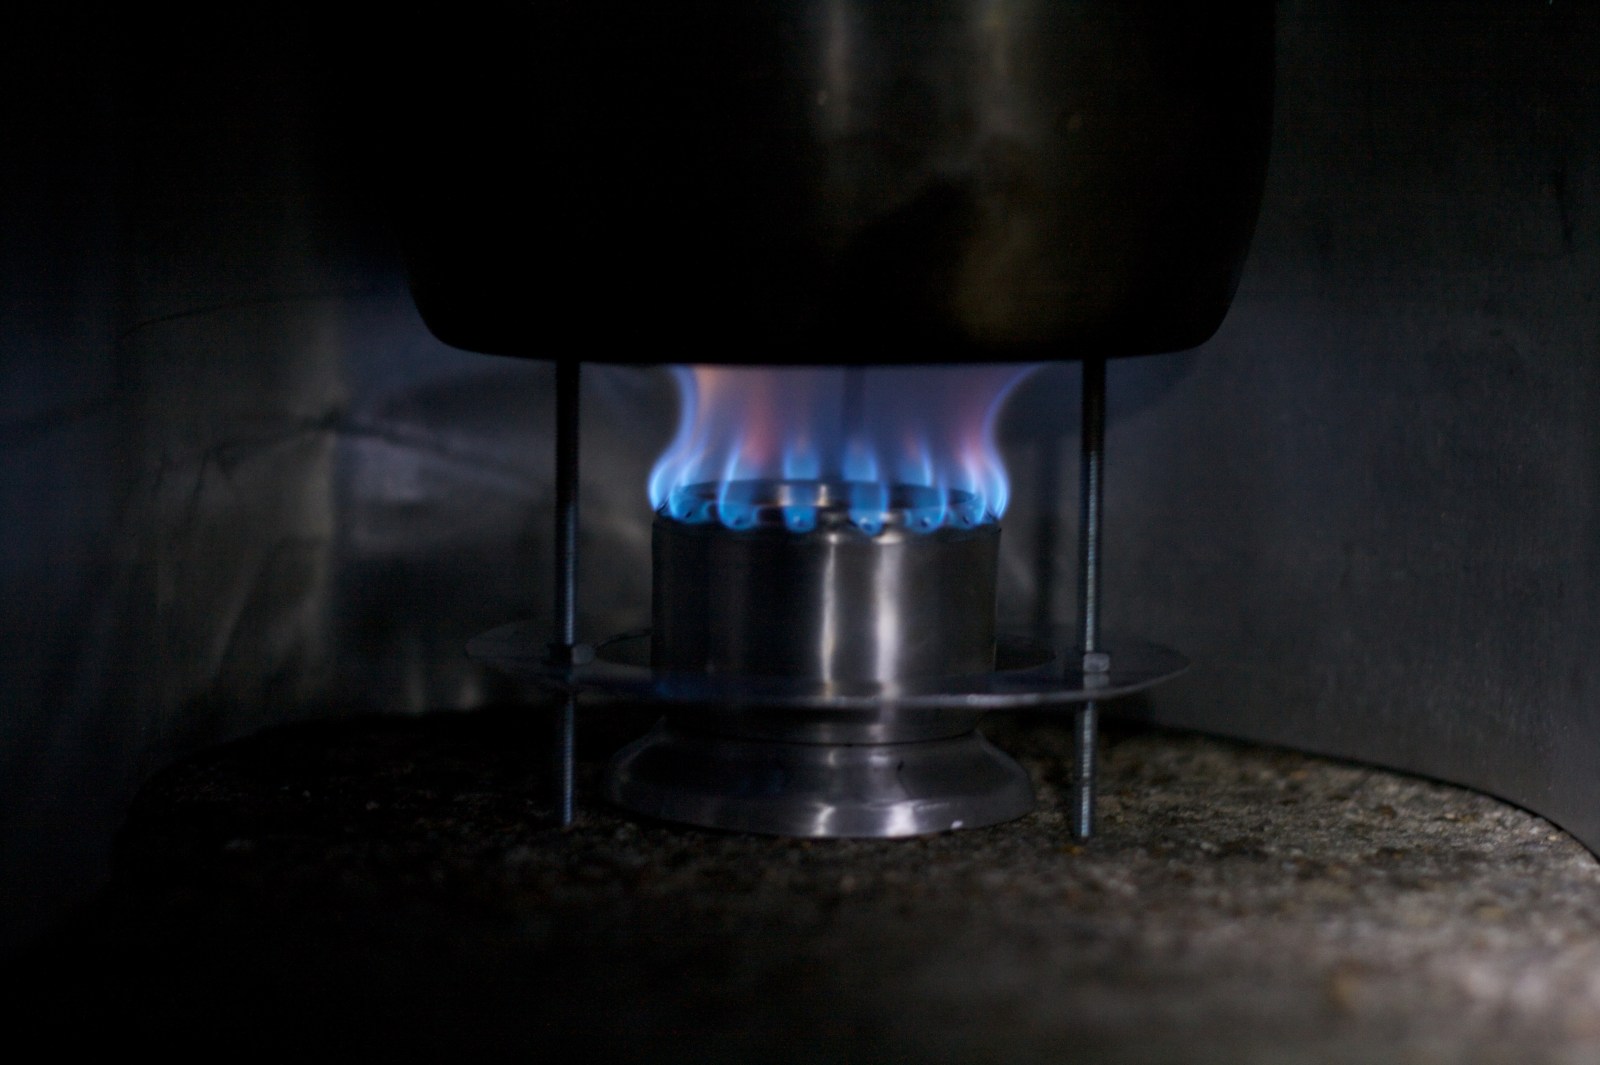
Plus all the rings fit on top of each other super neat!In order to provide more control, I’m testing a dual simmer ring setup, where a large aperture ring fits on first, followed by a smaller aperture ring. You can just see the seams of both rings in this picture.
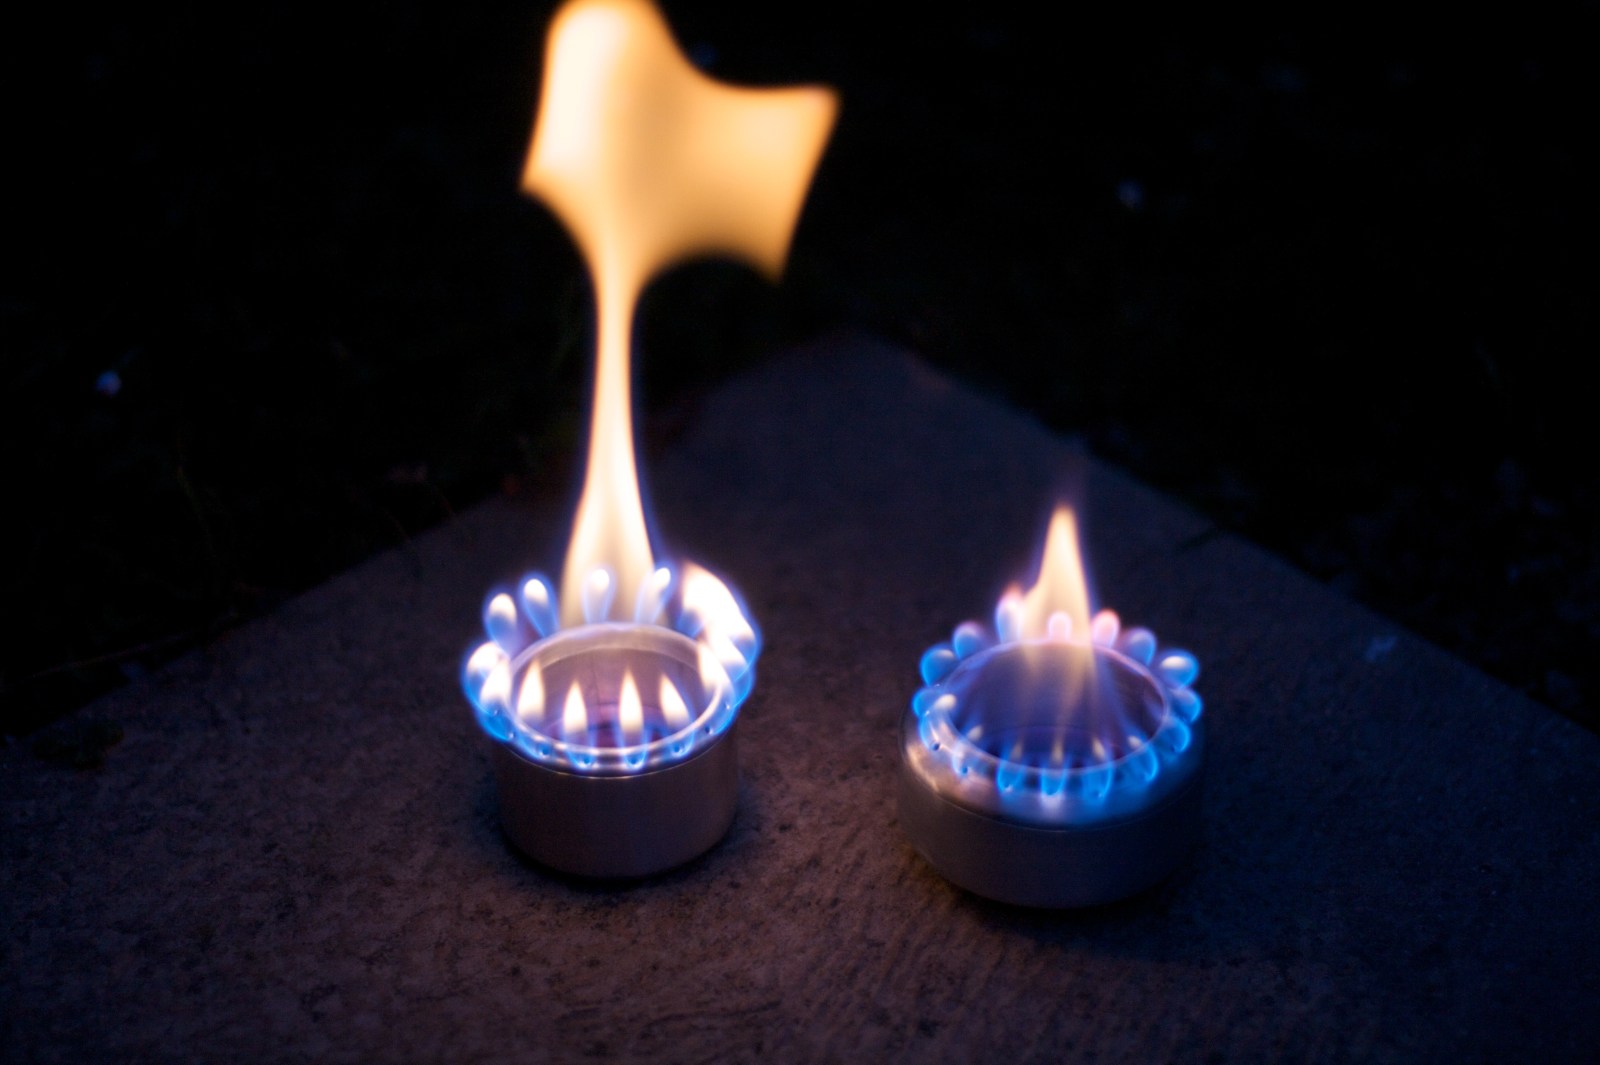
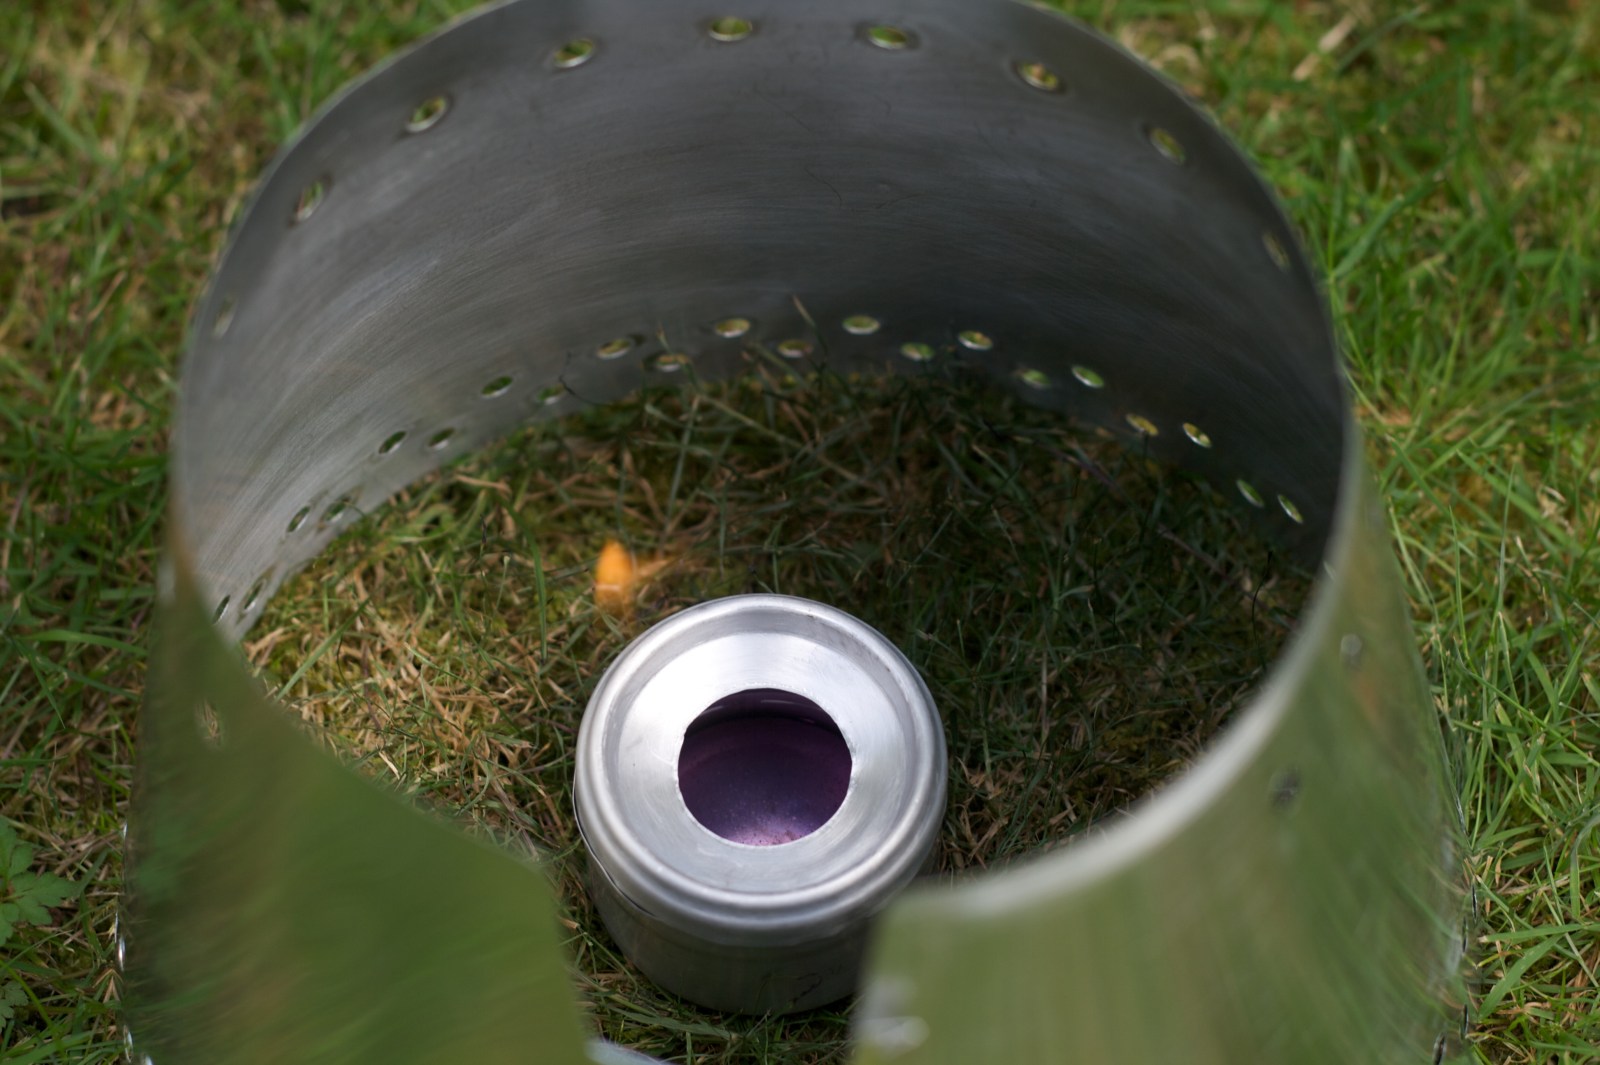
This works pretty well. The flame remains alive, but small, and the two rings combined cut off any leakage out of the side.While a near perfect fit, I’m not quite happy with theis simmer ring. It slots quite nicely into place, but without a handle, it’s still pretty tricky to drop onto the burning stove. And as this picture demonstrates, it still leaks vapour out of the side.The object of making the ‘red bull’ stove was to see if it was more efficient. This wasn’t a water boiling test, but on the face of it, it looks fiercer – and less efficient? – than the beer can version (on the right)Both made according to Captain Paranoia design. The first from standard beer cans, the second from 250ml tonic water cans (we’re not Red Bull drinkers…)As the stove heated up, the yellow flames returned. Though with a narrower spread than before. Maybe I could close this gap even more (though it is already 2mm less than the standard Trangia 24mm)…My firsrt attempt at a conical wall burner. You can just see a gap on the far side where the wall failsa to meet the upper dimple.
The conical wall was designed to reduce pressure to allow for a cooler burn and less spreading of the jets around the pan. I’d like to be able to use this burner with a much narrower pot, like an MSR Titan kettle or Evernew 900ml pot.
This stove took about 4 minutes just to bloom. I’m not sure if that was because of the poor seal, or too great a pressure reduction between the walls.V4 burner on the left:
4m20 to boil 300ml water
15ml meths used
I’m now measuring with a proper measuring tube so I’m more confident in the meths usage figures than previous tests.
V5 burner on the right. A slighly earlier version with a smaller aperture in the top. You can also see a second internal ring of puncture holes mistakenly put on the wrong side of the wall. I figured this wouldn’t affect performance.
This one didn’t bloom until the other stove had finished. It just took ages to heat up. Eventually boiled the water in about 12 minutes and I managed to recover about 12ml of meths from the original 30ml, but it was very difficult to reclaim the meths and also near impossible to burn off the residue.
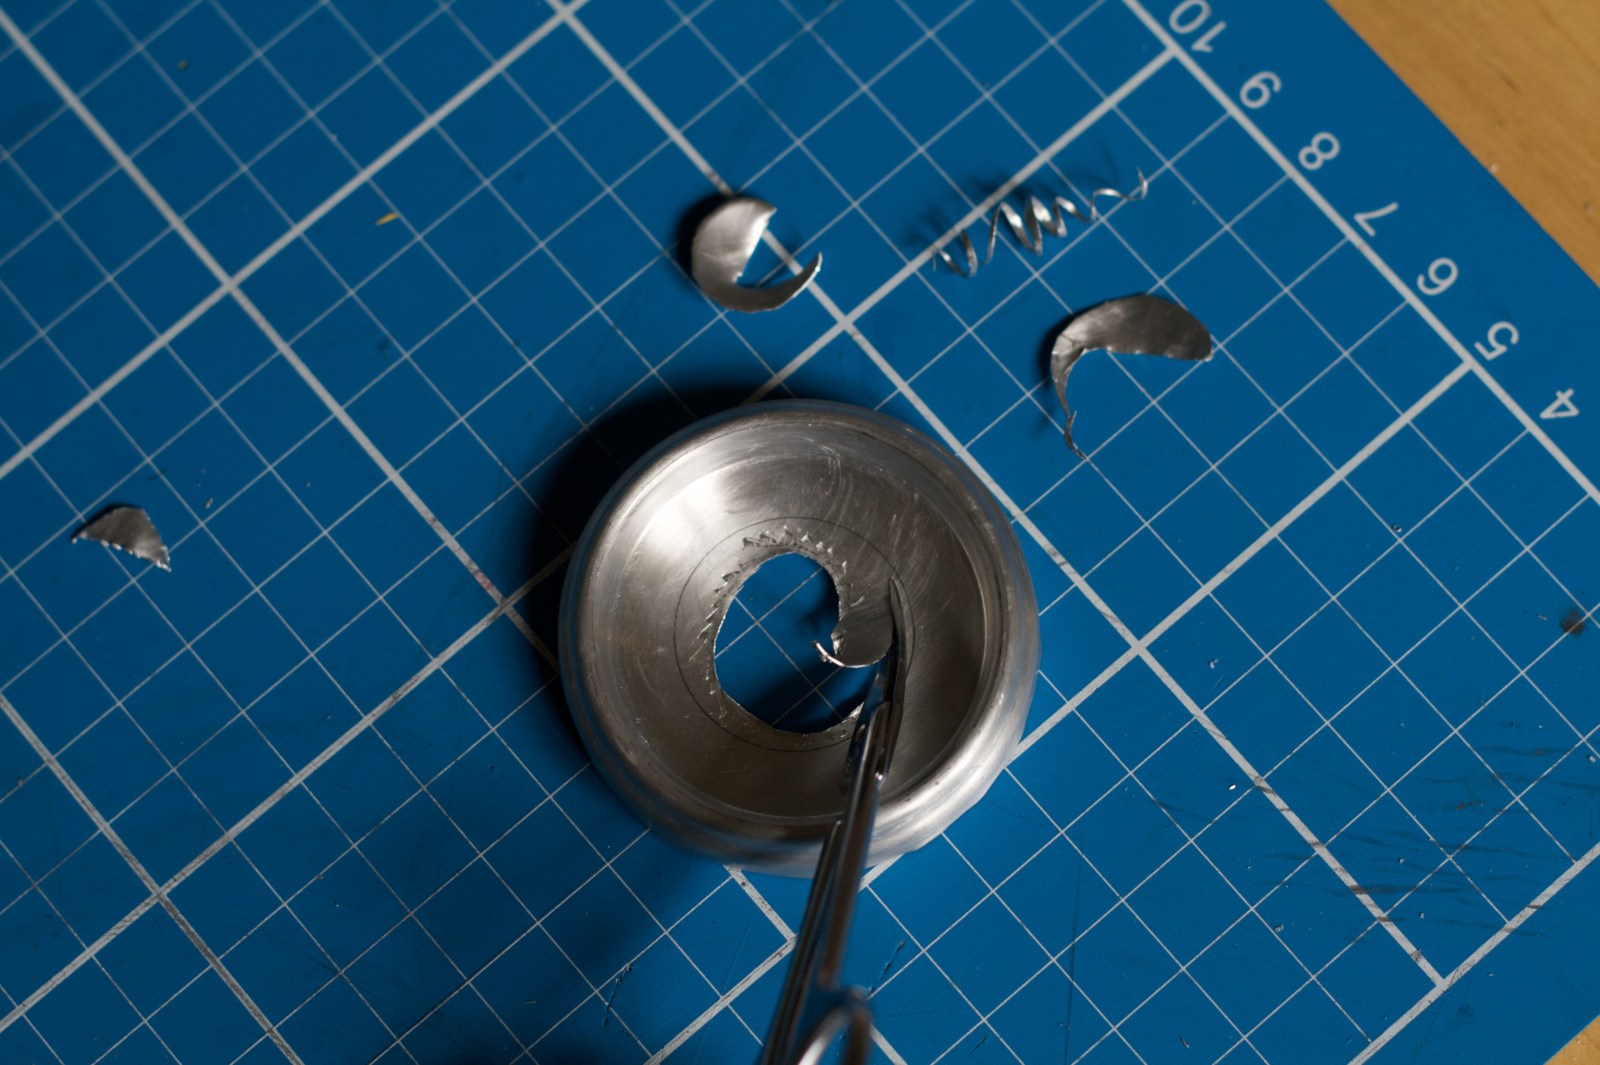
I subsequently widened the hole in the centre and got slightly better results, but still not a great design. I decided to turn to a simmer ring as an alternative way of controlling the output of this red bull design stove.This is the easiest way I’ve found to cut a hole in the base of the can. Made more difficult because the metal is thicker and the hole is circular, so you can’t use the normal score and fold technique.It works!Less success with the snuffer ring. I think I cut the sides too short.My criteria for this lid:
– Doesn’t extend beyond the lip of the pan so it packs neatly in a stuff sack
– Some way of stabilising the lid on the pot in heavy wind
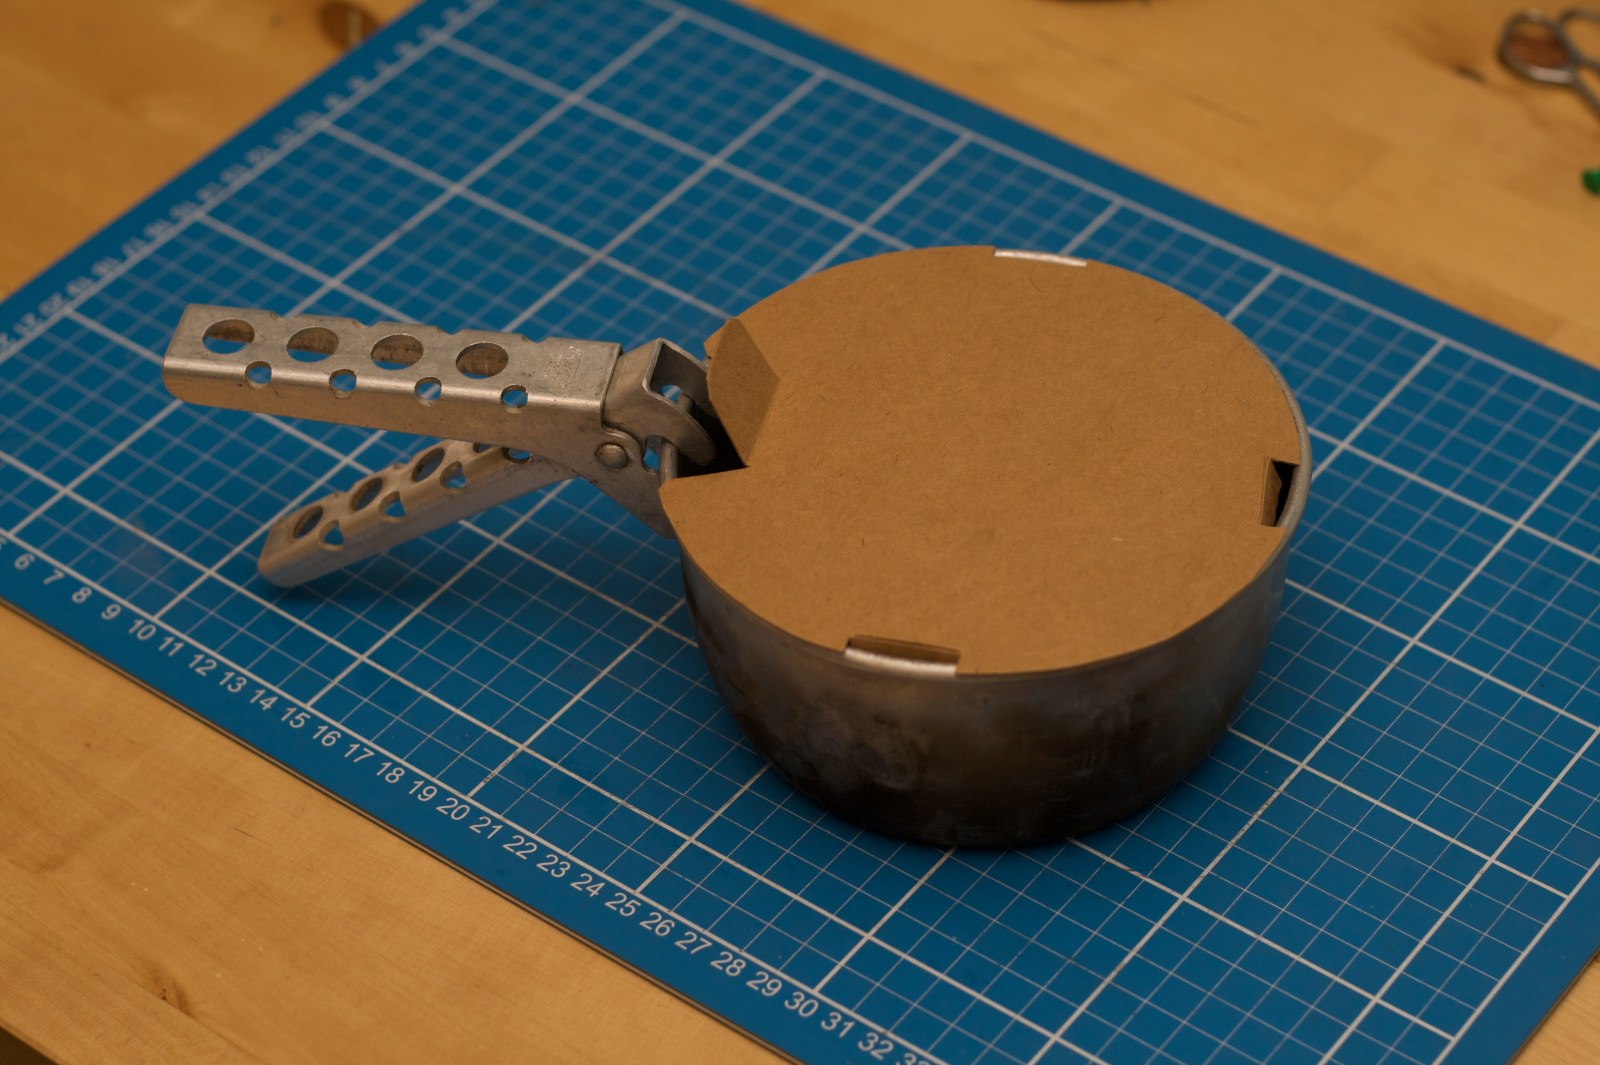
– A hole for the grab handle
– A means of lifting (or flinging) the lid off
– As simple and light as possible
I’m very happy with this design.
– The internal flanges work well, even on a card prototype.
– The flap that allows access for the grab handle doubles as a lifter for the lid, and would press flat in a stuff sack. If it broke off due to excess movement, the lid would still function.
– The only thing I’d change at this stage is to position the flanges at equal points round the circumference to equalise forces against the pan.A trail run of the more complex two part design of the Caldera Clone for my Trangia pan.
A little complicated for my tastes, and I’ve abandoned this one at the prototype stage as even in two parts it still doesn’t fit inside the pan.
If I get myself a taller pot I may well try this structure again.Looking for something with a smaller flame, I tried this design. For more see this forum thread:
http://www.outdoorsmagic.com/forum/forummessages/mps/UTN/22261/URN/5/dt/4/srchdte/0/cp/49/v/1/sp/I wanted to test the theeory that raising the stove would stop yellow flames forming. So far, so good…As the stove heated up, the yellow flames returned. Though with a narrower spread than before. Maybe I could close this gap even more (though it is already 2mm less than the standard Trangia 24mm)…Made from two 250ml tonic cans.
Things I like about this stove
– Easy to make (even in the field)
– Easy to pour out remaining meths
– Easy to burn off remains
Things I don’t like:
– It’s easy to spill meths out of the side holes if you over fill it or when moving it around
– My version at least was quite slow (this of course is a positive in many situations)
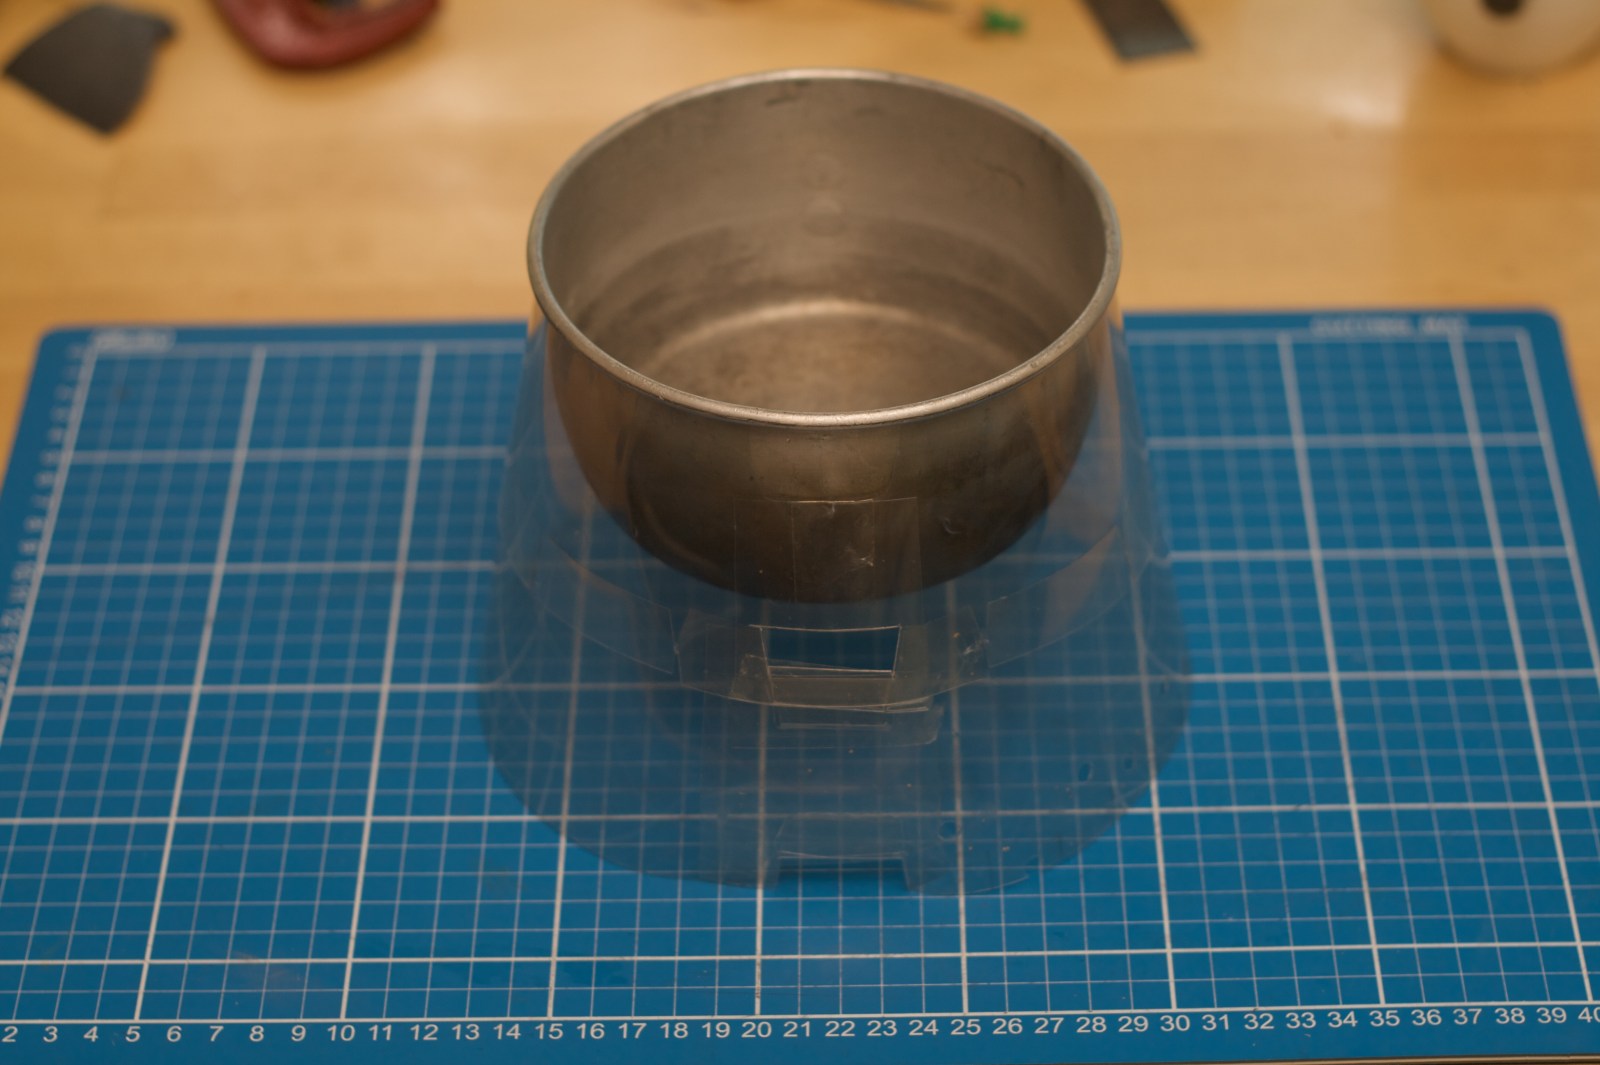
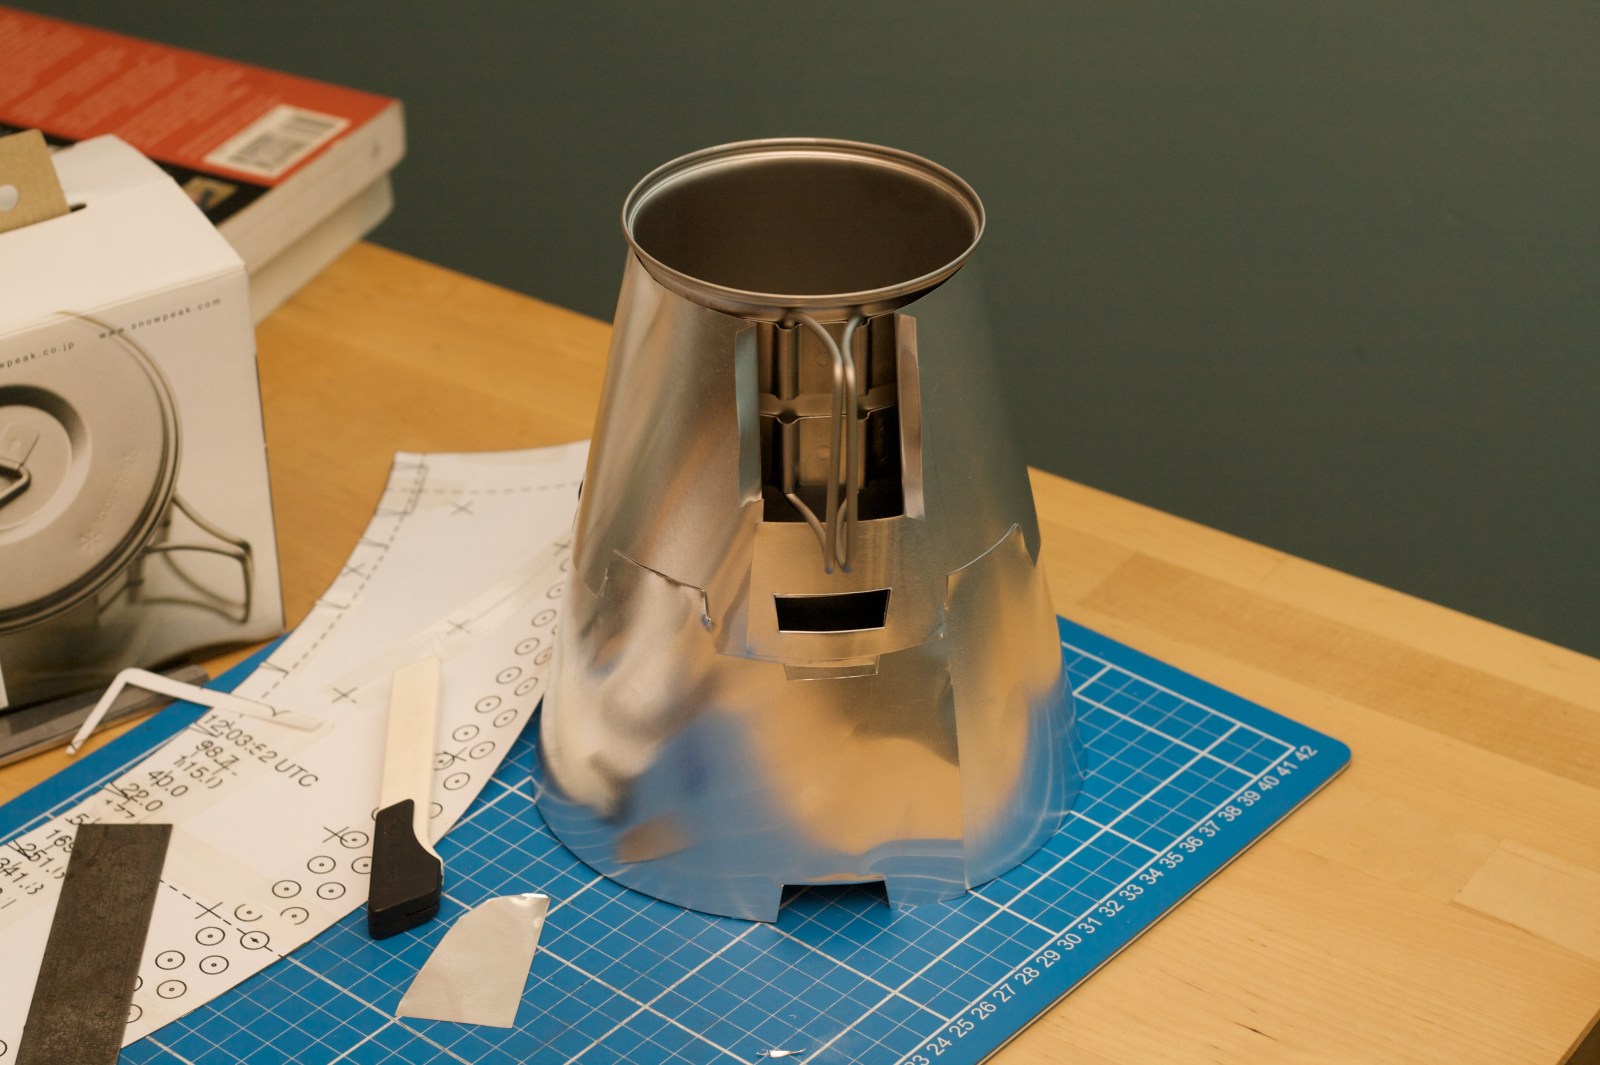
I’m having a ponder about how this could be modified. Maybe an internal shelf to help avoid spillage? More or fewer side holes? A deeper top cup?Having just bought a Snow Peak pot (taller and narrower than the Trangia pot, I decided to make the 2 part ‘flissure’ cone design, so it would stow inside the pot.Half-way there, I’ve assembled the cone with the Snow Peak pot to verify it all fits together. It does!Air holes punched, tabs folded and edges trimmed and finished.
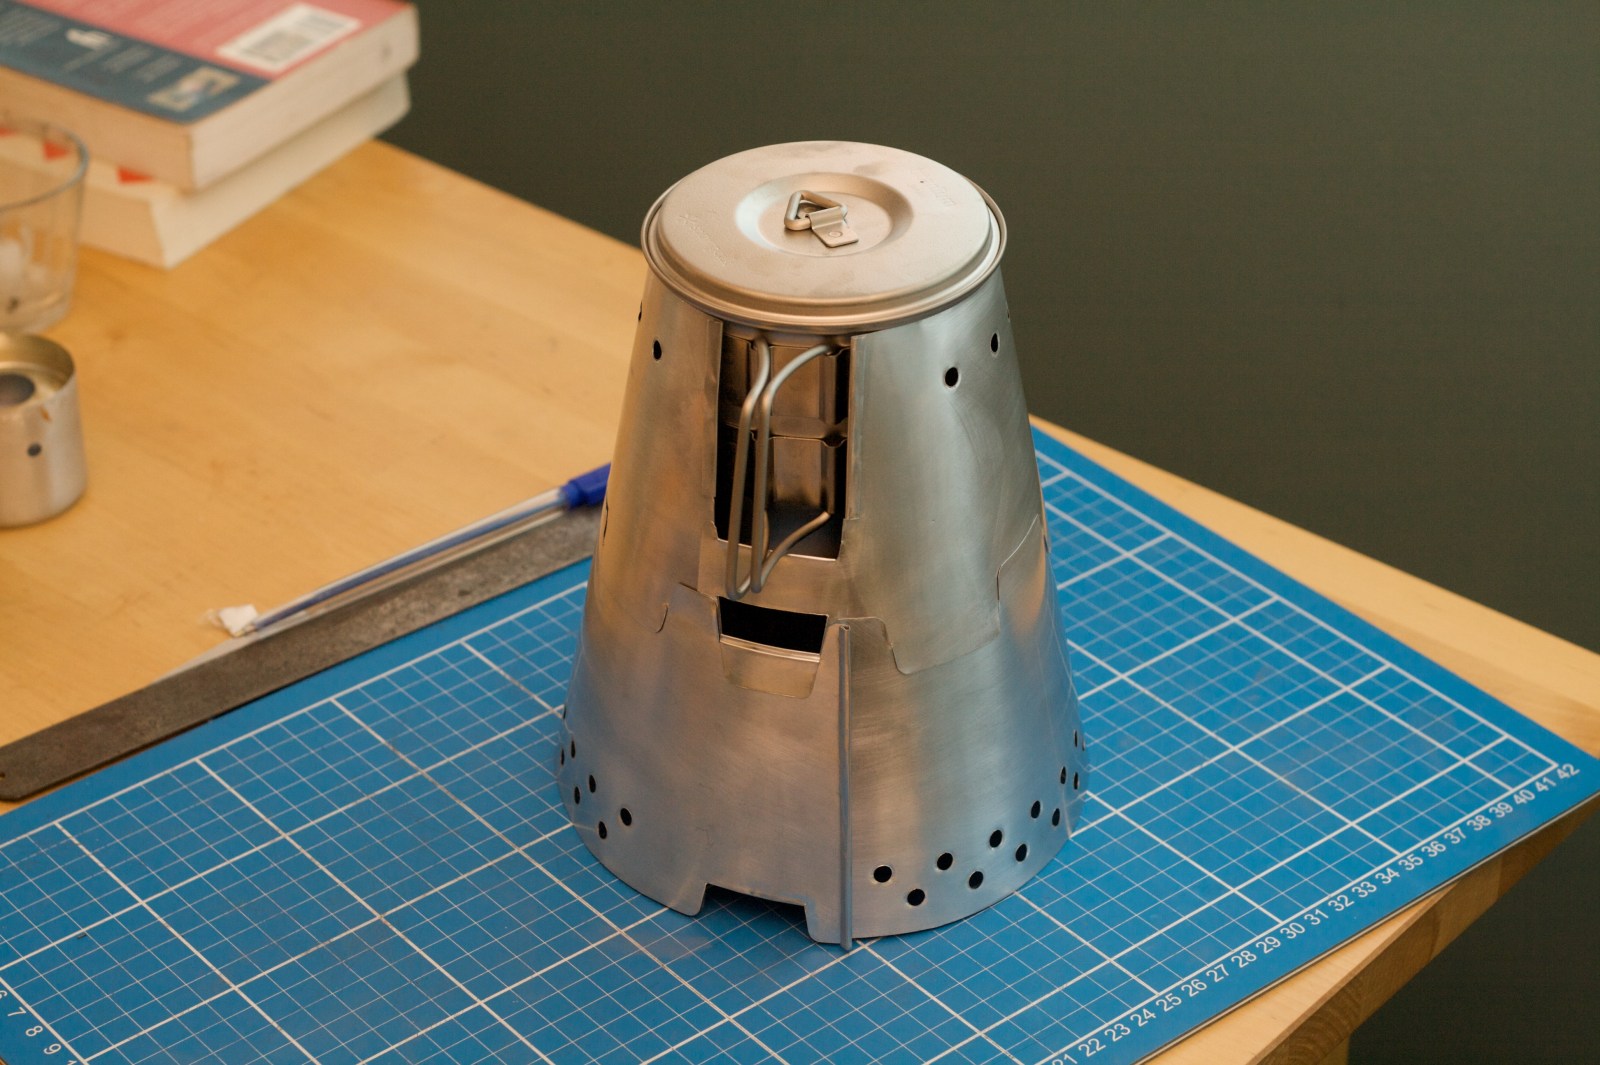
I’ve since used this for a short trip in Scotland. While it’s held up pretty well, I have noticed that the handles of the pot get very hot, so I may try a vrsion with a smaller hole, or some sort of flap to stop heat rising up here.
It’s also looking a bit scruffy and dented – all in one piece – but I’m not sure how long it would stand up to a tougher, longer trip. Partly that’s a function of the 2-part design, partly of the 0.15mm guage aluminium. So I may make a subsequent version out of the 0.25mm guage foil…You can see quite clearly where I have made the extra tab on the upper half.
Note: do not copy this design; see here for the correct template:
http://www.outdoorsmagic.com/forum/forummessages/mps/UTN/22357/URN/5/dt/4/srchdte/0/cp/16/v/1/sp/
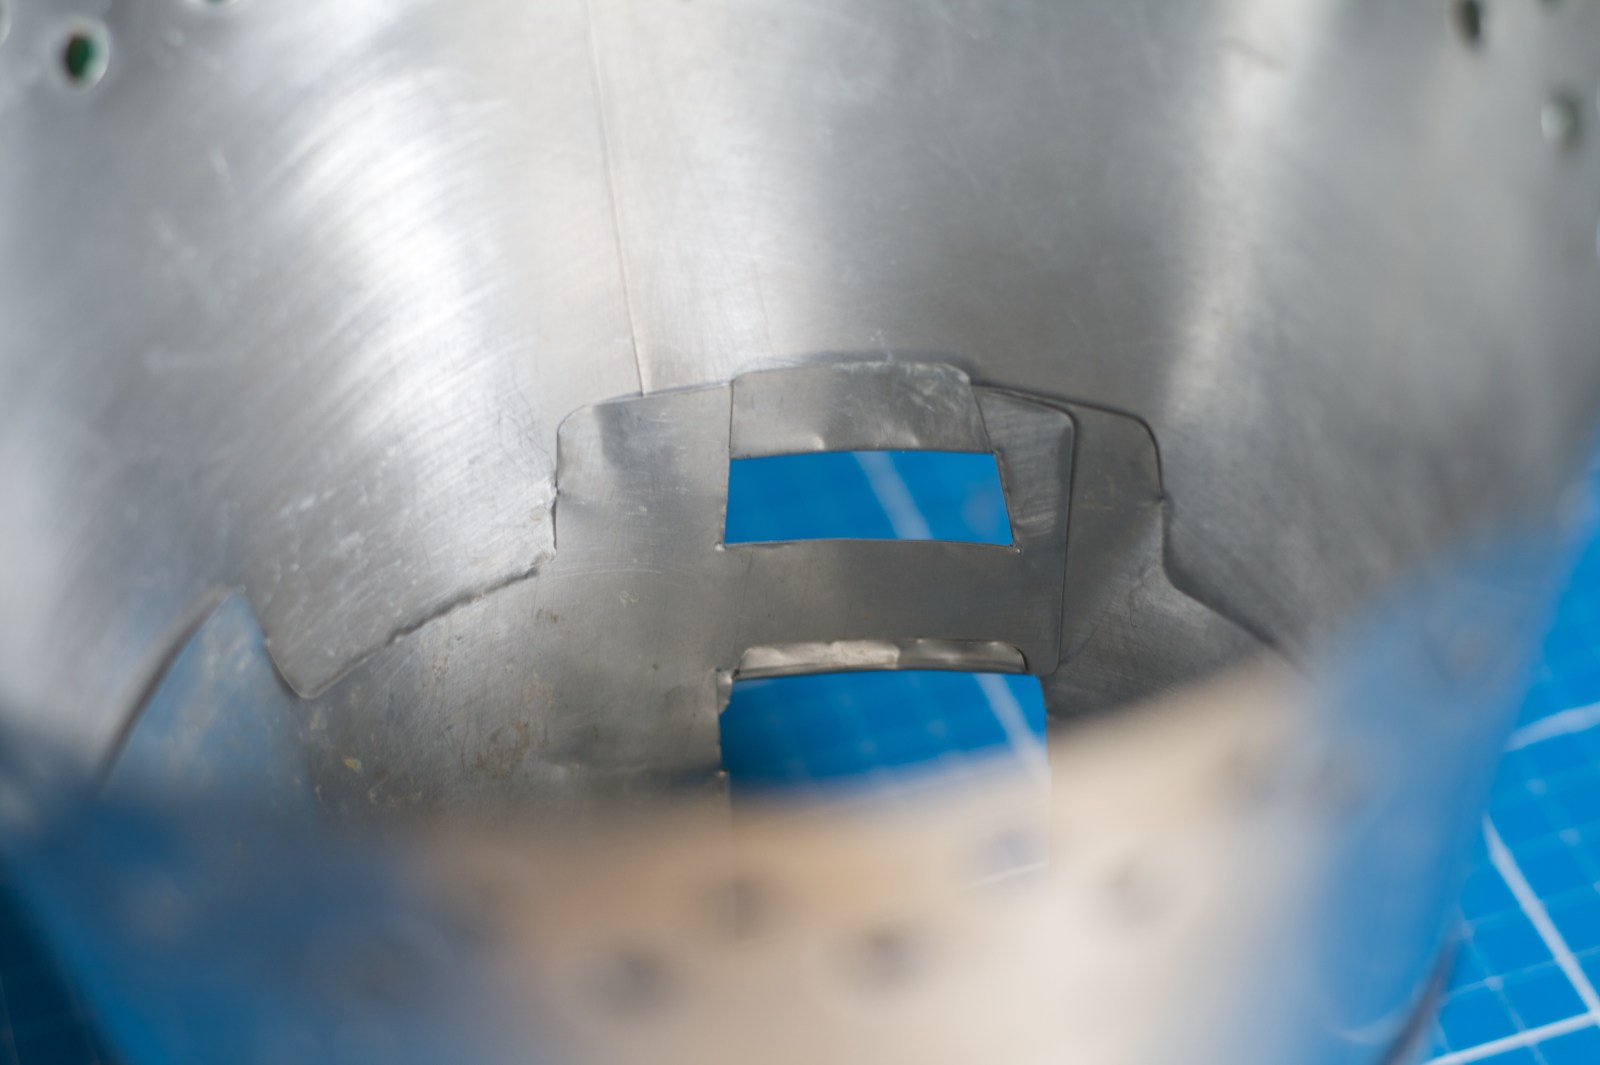
See messages 314 – 319 for a discussion of this issue.This is the tricky final step – the last tab on the top cone has to go inside the bottom cone, but those on either side have to go outside the bottom cone.
I suspect if the top cone were not joined under the gap for the pot handles, you could start mating the two halves here and work round to the front much more easily.From the inside, you can also see the small extra fold I made on the upper cone to stregthen this joint.
Note: do not copy this design; see here for the correct template:
http://www.outdoorsmagic.com/forum/forummessages/mps/UTN/22357/URN/5/dt/4/srchdte/0/cp/16/v/1/sp/
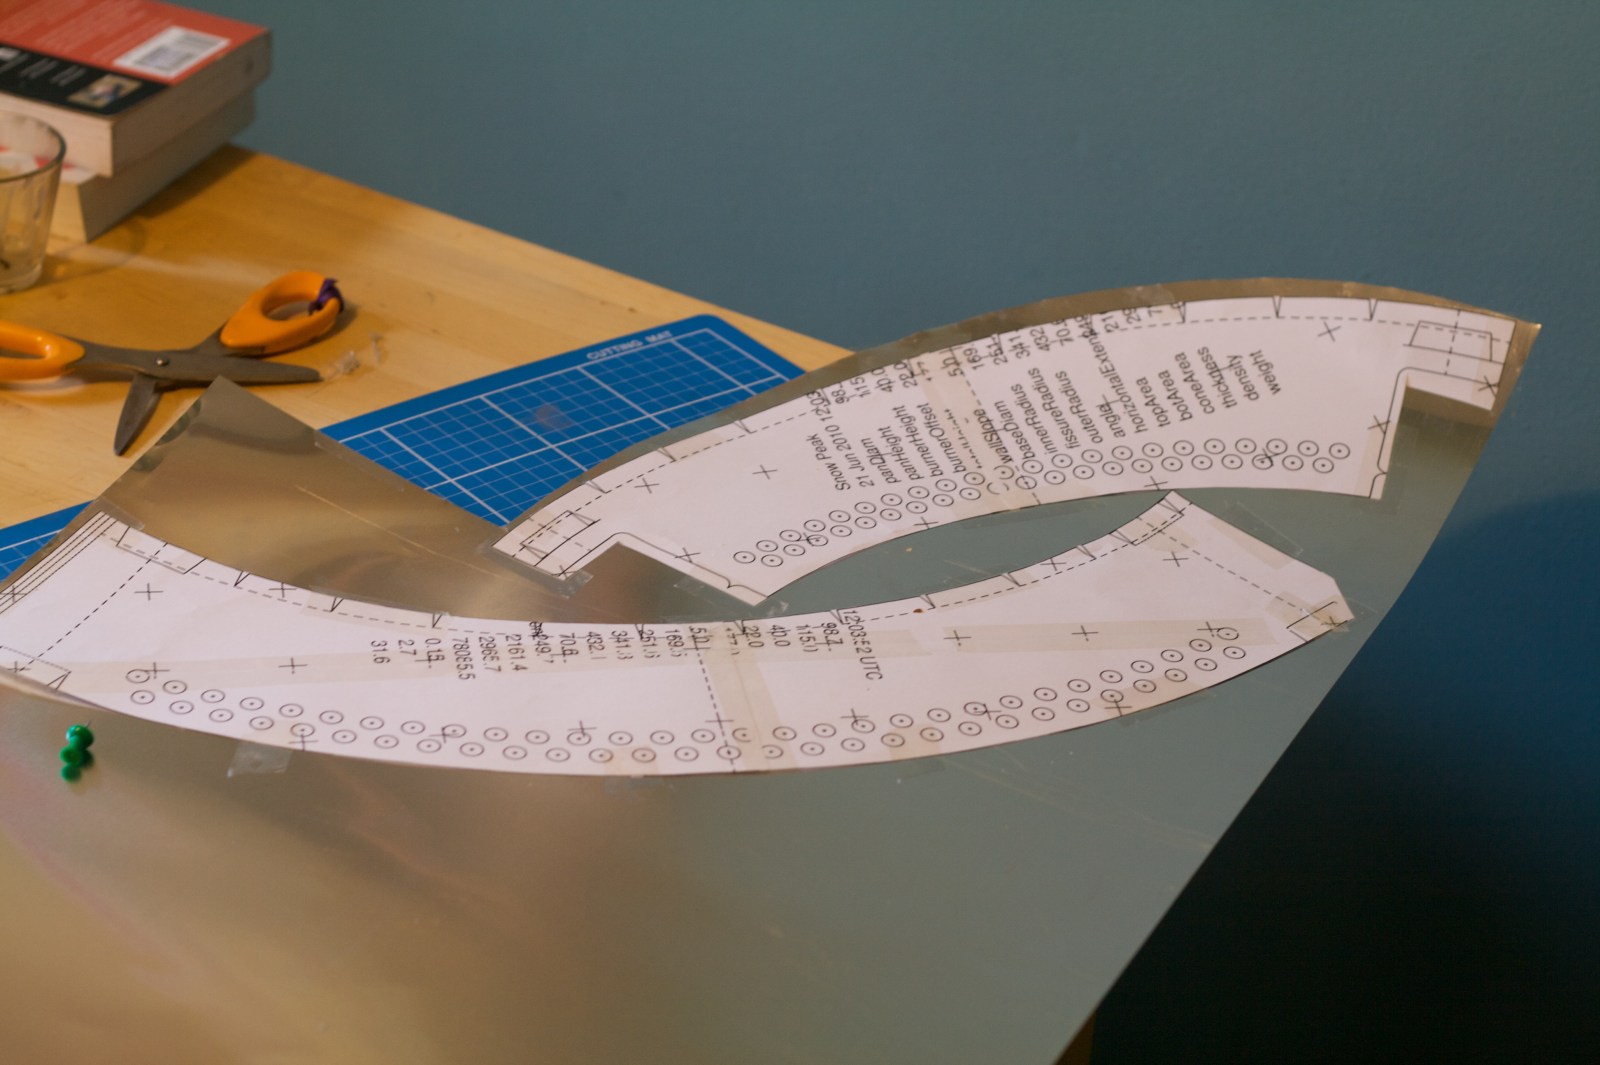
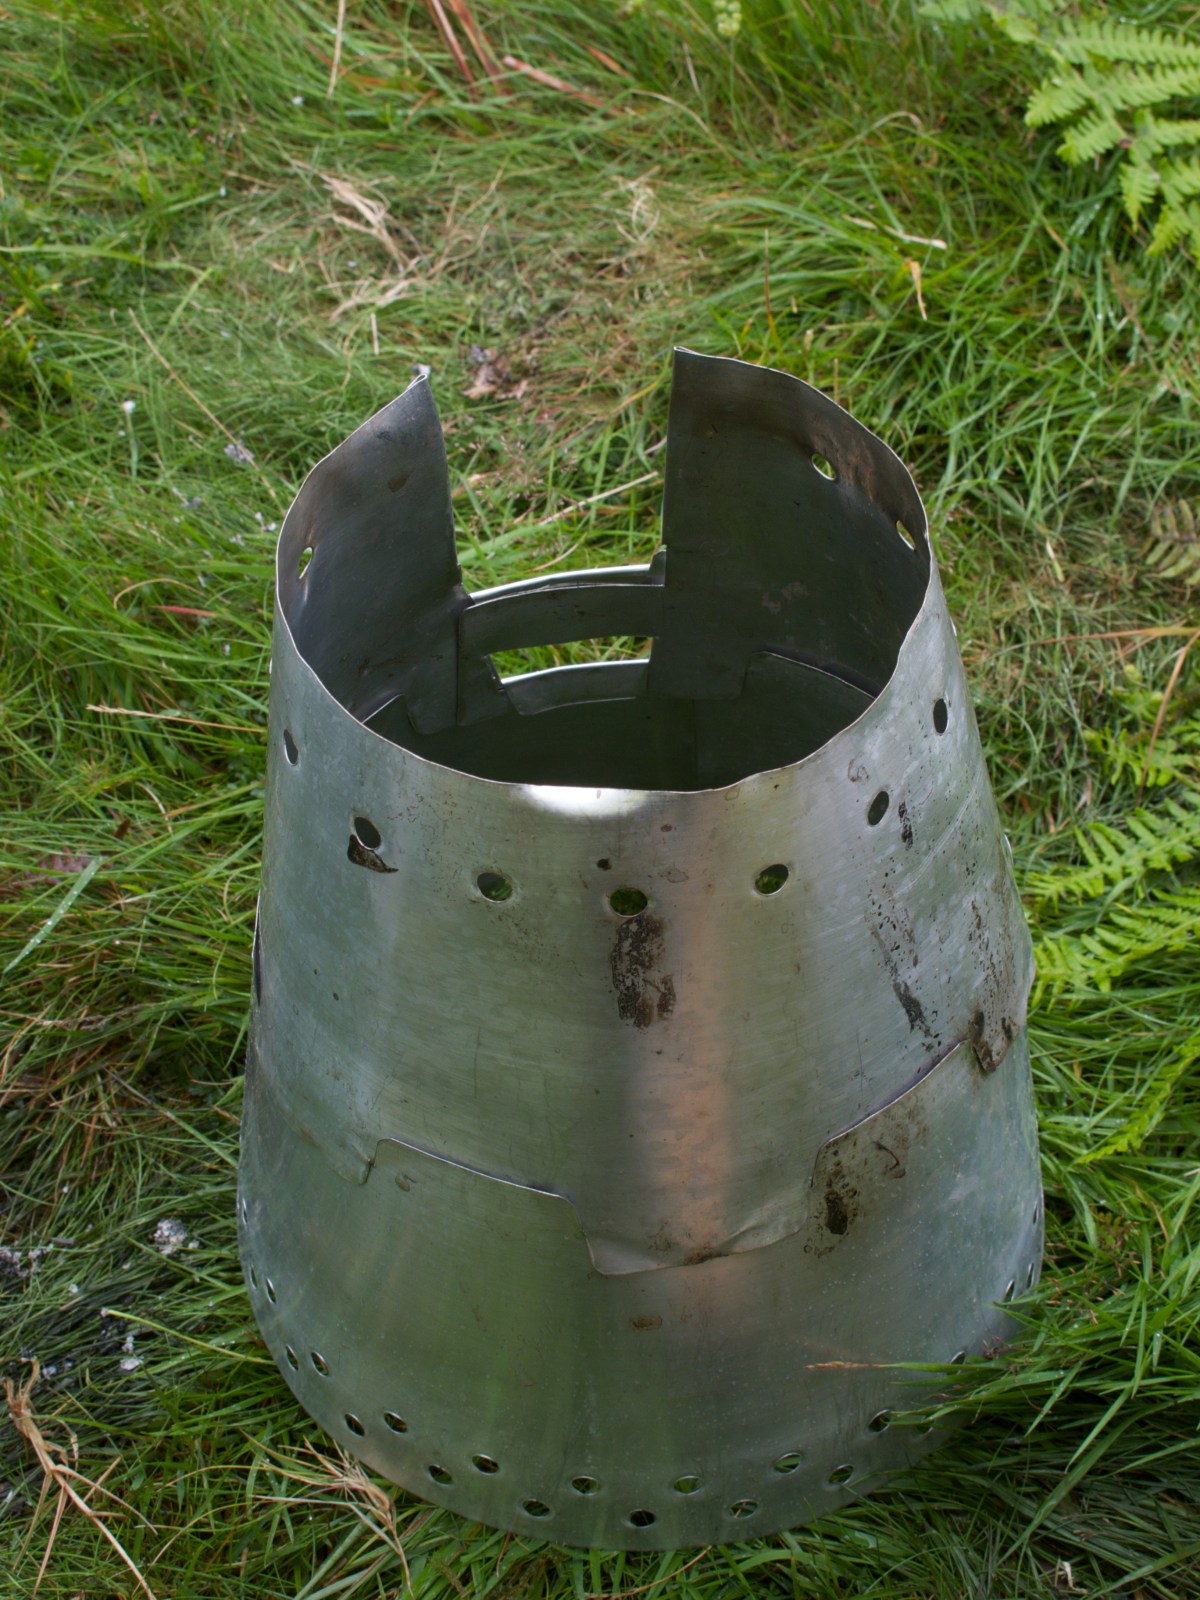
See messages 314 – 319 for a discussion of this issue.The Caldera Clone and DIY burner in use in LangstrathI’ve used the Caldera Clone / Snow Peak Solo combo on a couple of trips now, and I’m generally very happy with it. But the Clone – made from 0.15mm guage aluminium – is beginning to look a bit crumpled, so I wanted to make a revised version outer of thicker 0.25mm guage foil.
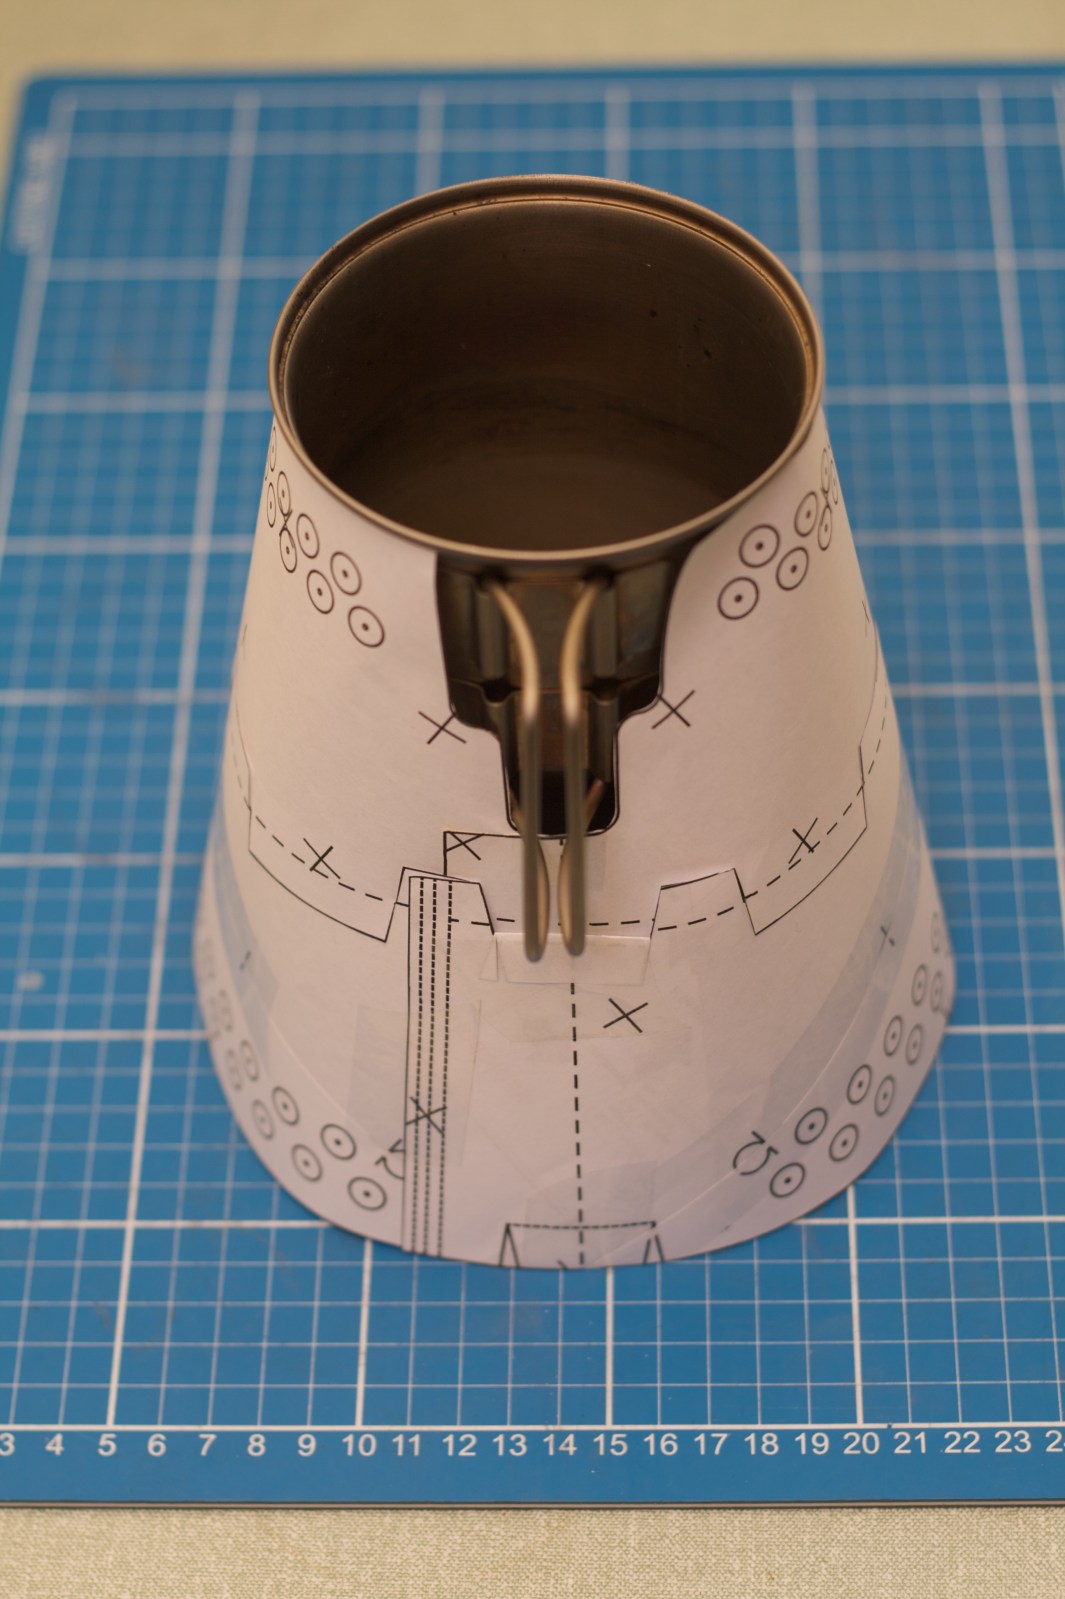
Here it is as a paper template, assembled with the pot to check measurements.Here is the cone with the basic shape cut out, but before punching vents or finishing.
You can see (if you look closely) that the pot rests on its ridge, not the rolled lip. This design is sub-optimal, as the weight of the pot applies outwards force on the cone. If the cone slotted into the gap in the rolled lip of the pot, this force would be inwards (or down at least) thereby making the whole structure more secure.
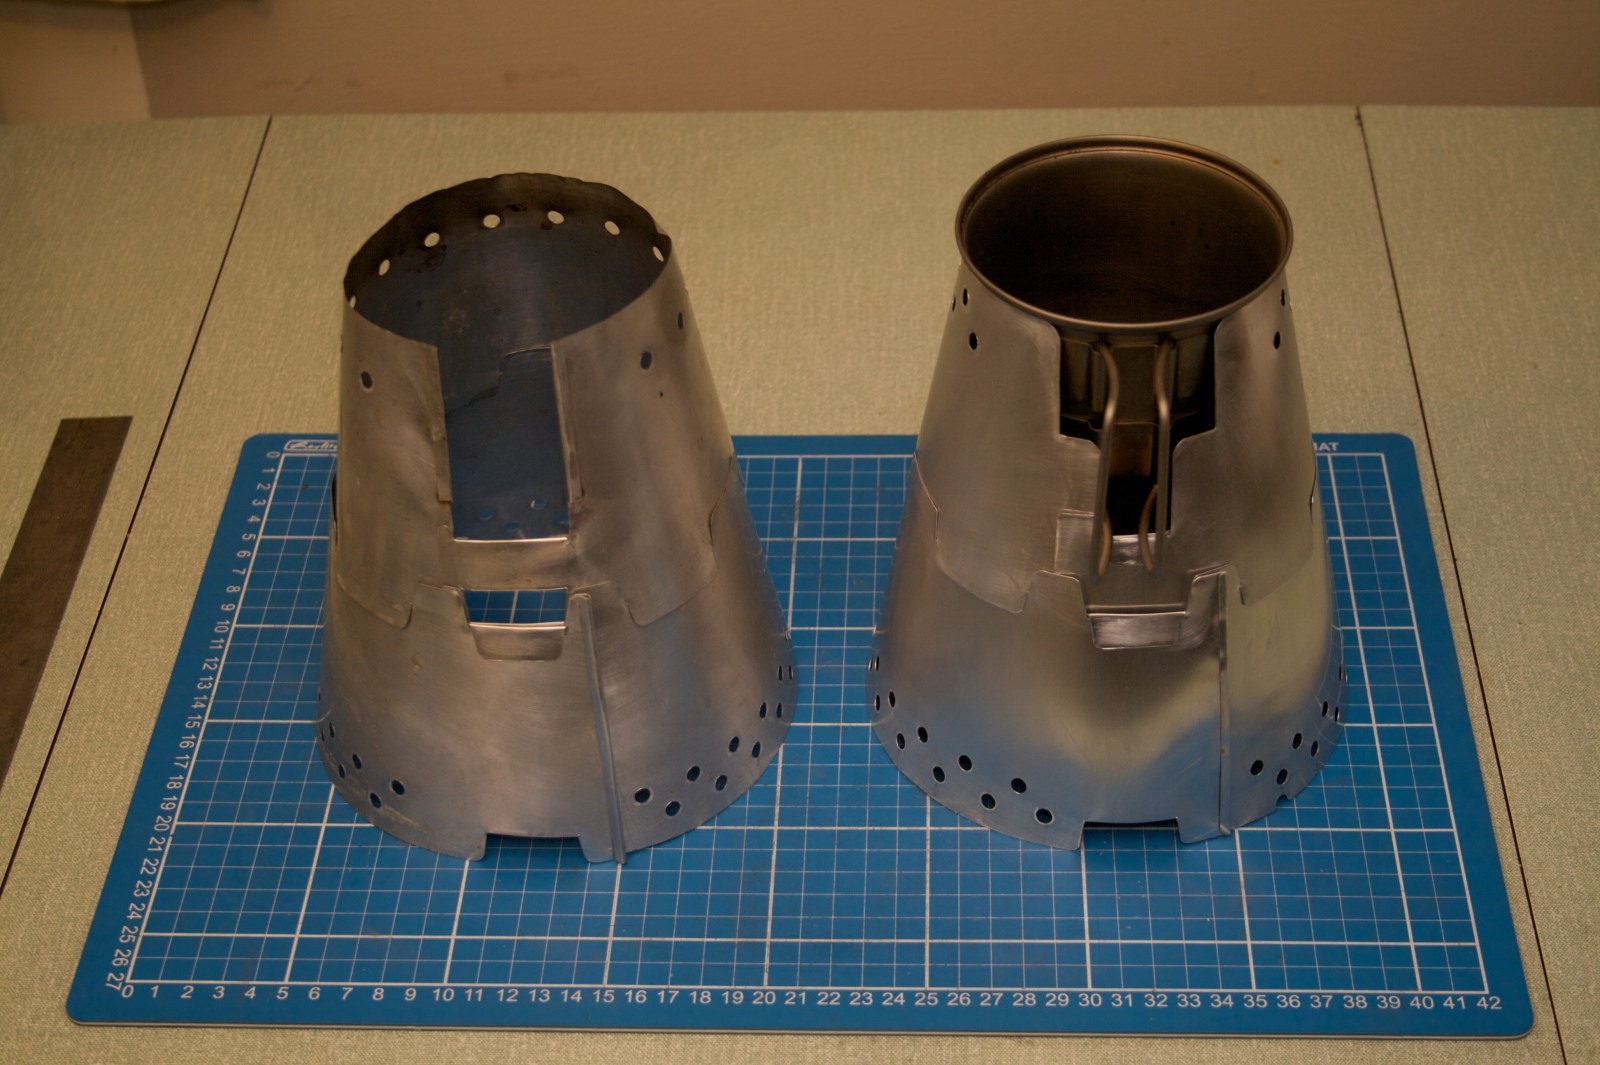
Unfortunately, while it had been my intention to make it this way originally, the foil is just a little too thick to fit into the small gap in the lip of the pot.On the left, the old cone in slightly battered 0.15mm foil. On the right, the new cone in shiny new 0.25mm foil.
You can see I’ve made a much better handle opening, which lets less heat out (and keeps the handles cooler). I’ve also fixed the mistake in the top half of the cone where I cut a tab joint in the wrong place.