In my early prototyping, I made quite a few mockups in software and in hard copy using Indesign software. I discovered some quirks along the way…
This post is part of a series covering the production of a photozine. Other posts in the series:
You can buy a copy of the zine here.
Adobe InDesign is the standard layout software for printed publications, and has a handy tool to help you test a book layout before going to print: Print Booklet (https://helpx.adobe.com/uk/indesign/using/printing-booklets.html)
The Print Booklet feature lets you create printer spreads for professional printing. For example, if you’re editing an 8-page booklet, the pages appear in sequential order in the layout window. However, in printer spreads, page 2 is positioned next to page 7, so that when the two pages are printed on the same sheet, folded, and collated, the pages end up in the appropriate order.
This sounds promising, but in practice is fiddly to use, and I found a couple of gotchas.
Print blank pages
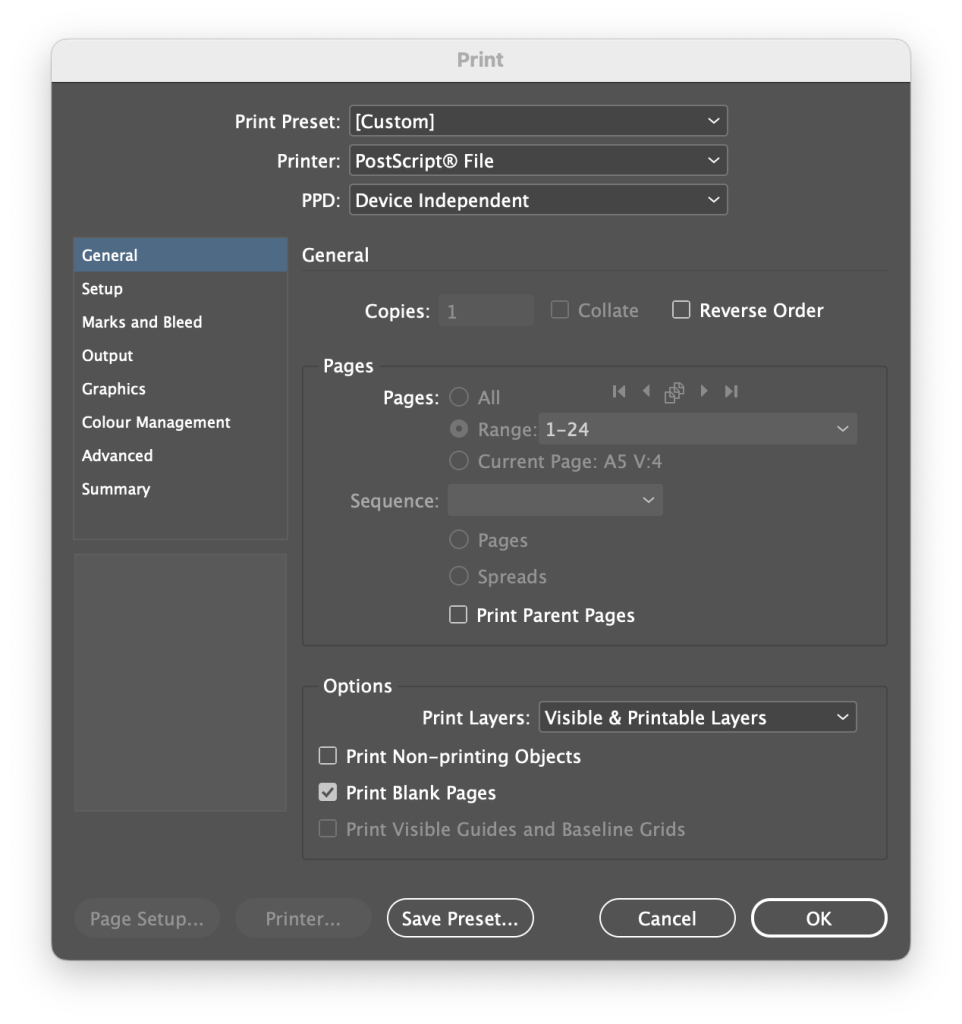
The InDesign website takes you through most of the options in this dialog, but there is one key checkbox they miss. If your booklet contains blank pages, you must tell InDesign to include those, otherwise your booklet will be re-paginated with those pages missing, and your spreads will be incorrect. I can’t imagine why this is the default, and to make matters worse the option to change it is not on the main dialog. I found the solution here: https://creativepro.com/print-blank-pages-messes-up-print-booklet/
You must click into Print Settings… to change this default.
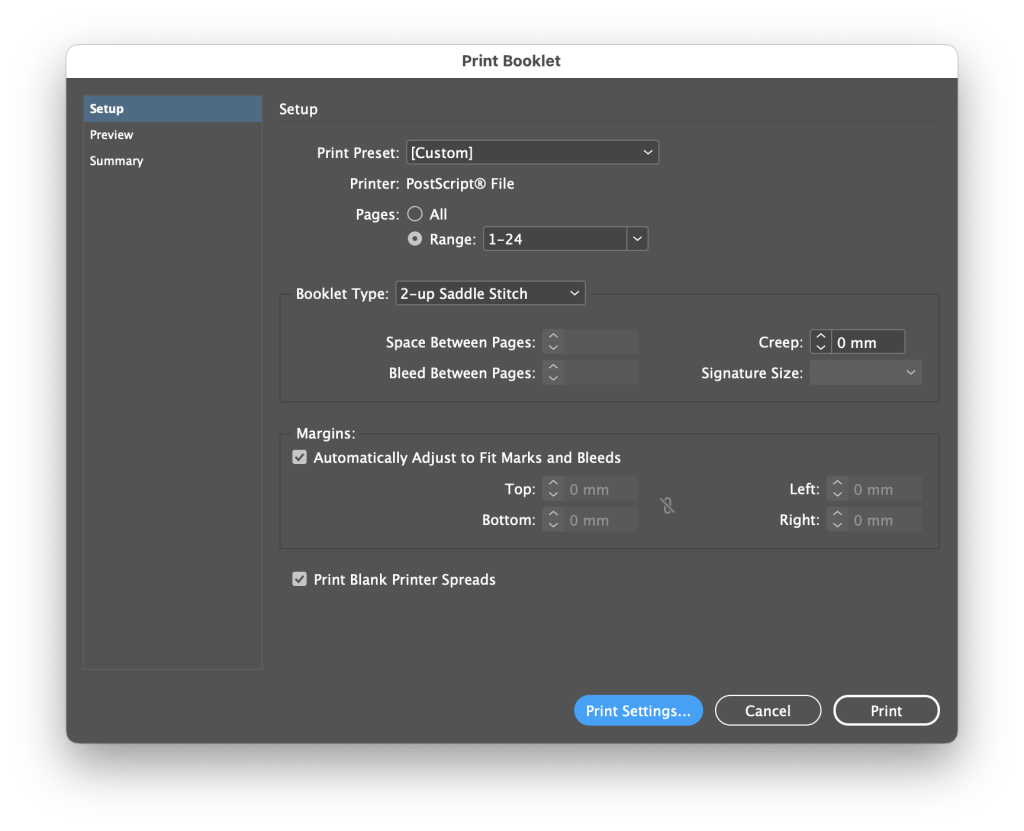
At the bottom of this second dialog is the Print Blank Pages checkbox. Make sure this is checked to ensure your spreads include all pages.
Print to PDF
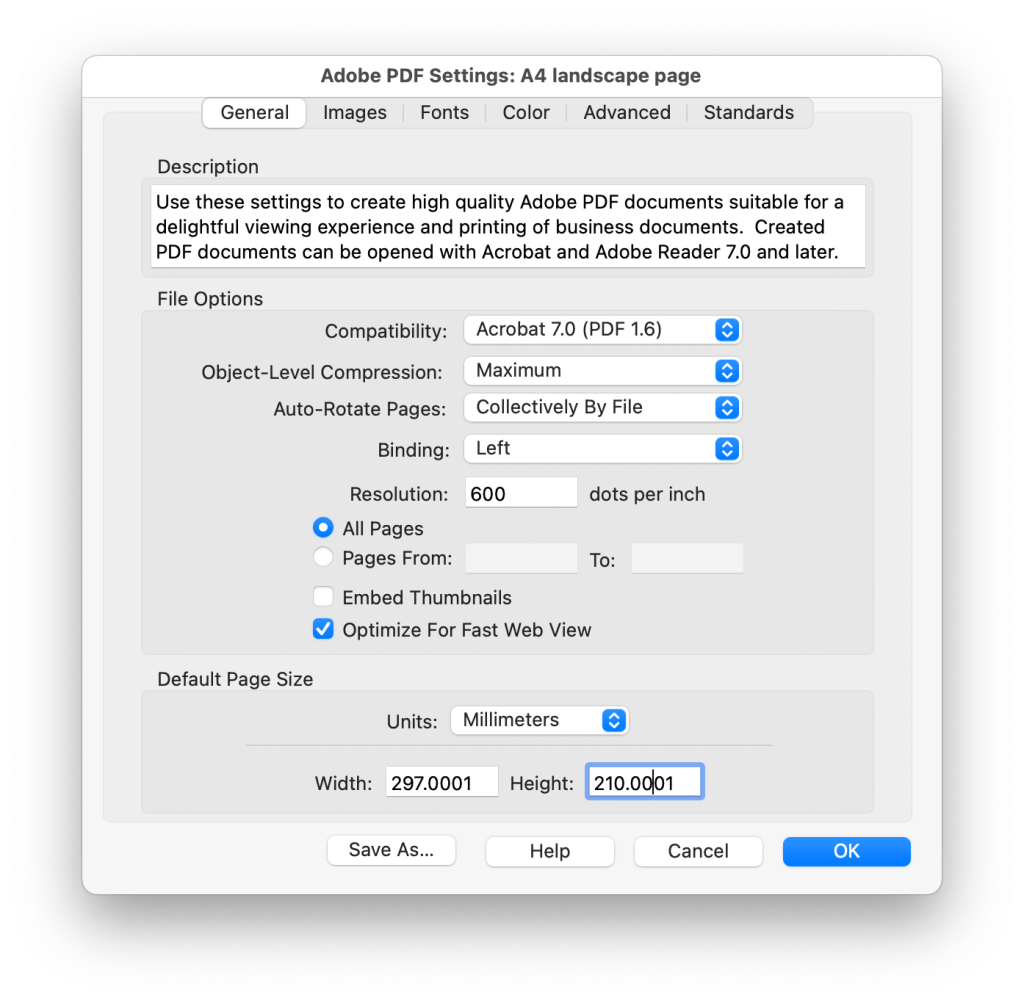
My printer is at work, but I’m doing this project at home in the evenings. So what I really want to do is print the spreads to PDF at home, and then just print that PDF quickly at work when I have a spare 5 minutes. In most Mac apps, you can select PDF as a target printer in any print dialog, but not so in InDesign. InDesign only offers Postscript as a file output from the Print Booklet dialog (there are other PDF export options elsewhere in the app). Nothing wrong with Postscript, but if you open that file in Preview or some other PDF viewing app, you’ll get a portrait crop of each spread at the wrong page size (21.59 × 27.94 cm, which is US letter size). In my case I want a page size of A4 landscape (29.7 × 21 cm).
After much head-scratching, I realised that the Preview app is using a PS -> PDF converter (PSNormalizer.framework, it turns out) that uses reasonable-enough defaults, but nonetheless defaults which you can’t control. So the solution is to use a different PS -> PDF converter, which does allow you to control the conversion settings. And Adobe in fact makes such an app: Acrobat Distiller. You can create some new conversion settings by choosing from the menu: Settings > Edit Adobe PDF Settings…
In my case I just set the Default Page size to be A4 landscape; saved this as the default seting and dragged and dropped my PS file onto the window.
Problem solved – now I have a PDF file of printers spreads, A5 portrait pages imposed onto A4 landscape sheets.
In order to print these proofs on an office printer, make sure you select short-edge binding in the 2-sided printing options, so the pages on the reverse of each sheet are printed in the correct orientation.
This post is part of a series covering the production of a photozine. Other posts in the series:
You can buy a copy of the zine here.

Leave a comment