
I wanted to make a special object. I could have had the whole zine digitally-printed, but it seemed like a missed opportunity, so I decided to have the inside pages printed, and do something more interesting with the covers and binding.
I have access to a laser cutter, so my plan was to use coloured stock for the covers and engrave a typographic design. Coloured paper generally lightens when engraved with a laser, giving an effect that is difficult to achieve by any other means.
Read more: Laser-engraving the coversThis post is part of a series covering the production of a photozine. Other posts in the series:
You can buy a copy of the zine here.
Settings
Acheiving a good result requires some experimentation, and all lasers and papers behave differently.I found (using a Trotec Speedy 300 laser) that these settings worked well:
- Speed: 90%
- Power 20%
- DPI: 500
- Options: ‘High quality’ setting, which means “Uniform laser engraving by consistently traversing the entire job width at the same speed so that acceleration and speed remain constant across the entire graphic.”
The laser moves very fast from left to right and back again while it’s engraving. Without this high quality setting it slows down as it gets to the end of each pass, which makes the left and right edges of the engraved area more heavily marked.
I found that mid-toned papers worked best. In this image, on the left is one of my first tests with some no-brand black cartridge paper. The engraved areas have a green tint and are uneven and grainy. On the right is some Colourplan ‘Nubuck Brown’ which gives a much cleaner finish.

Stock
I ended up settling on two different stocks, both from GF Smith:
- Gmund Bier (Bock) 250gsm for the special editions (numbers 1-5)
- Colorplan Scarlet 270gsm for the regular editions (number 6-25)
Both engrave beautifully.
Laser placement jig
When the laser is running, fans suck air out of the chamber to exhaust smoke. This tends to lift the paper off the bed. The conventional solution is to tape it down with masking tape, but I wanted a solution that would not risk damage to the paper, and would also make it easy to accurately position material repeatedly.
So I designed a little jig in Illustrator and laser-cut it out of 3 mm MDF:

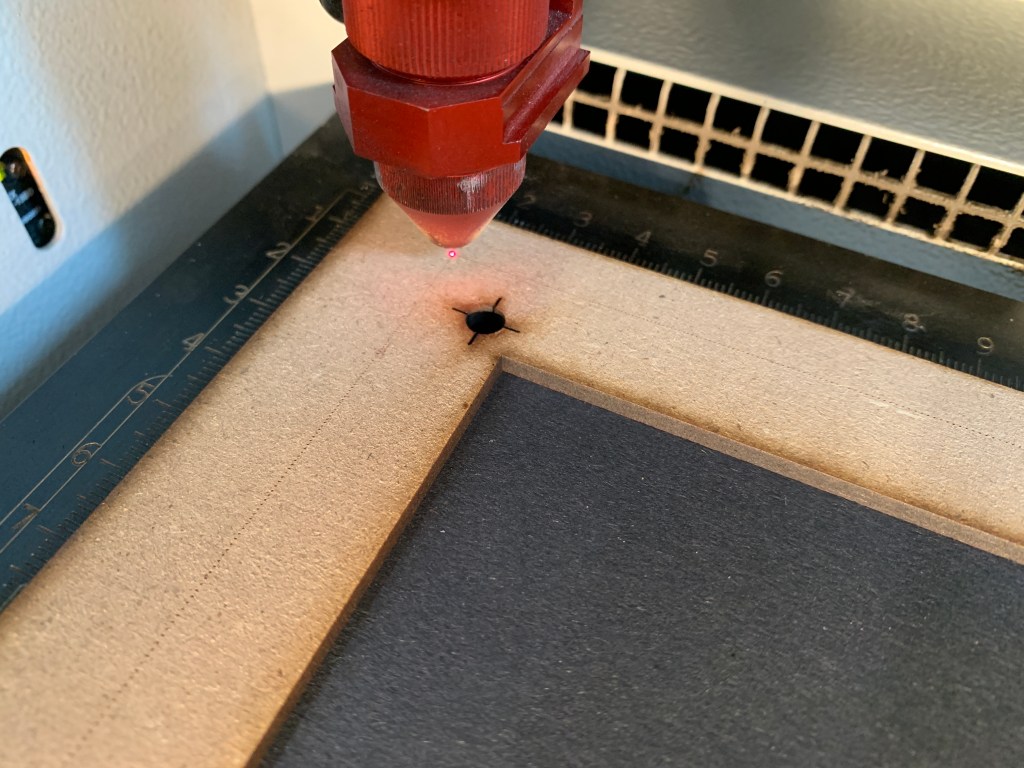
It has a few key features:
- It’s sized a little over A4 (350 x 250 mm).
- Inside is a cutout a little under A4: 5 mm undersized all round (ie. 287 x 200 mm).
- Marked with a very light cut on the frame is a rectangle marking a size larger than A4 that I can make all my artwork at. It doesn’t really matter what this size is, as long as you can use the same size for the artwork. I made it 10 mm oversized all round (ie. 317 x 230 mm). I produce all my artwork at this size – including bleeds, so I can precisely align my origins for the artwork and the laser in the same place. In the second image, you can see the laser at its starting point in the top left corner of that marked rectangle.
- There are 4 crosshairs with small circular holes placed at the corners of an A4-sized rectangle. The holes allow you to look through the frame and check that the paper is placed in exactly the right spot.
In combination, these features allow me to:
- Hold down the paper in a fixed repeatable spot on the laser bed each time
- Align the laser at a fixed repeatable origin point each time
- Snap align my artwork file to the laser origin in the laser control software
In case it’s useful, you can download a copy of this frame artwork in PDF format here.
One thing to note – my artwork has a safe area around the edge where I can safely mask off the paper with the jig. In fact there is a small region on the left and right sides where I need to trim back the frame to allow one element to be engraved right up to the edge and onto the bleed region. This type of hold-down frame won’t work if the artwork to be engraved is largely full-bleed.
One experiment I tried without success was to laser-engrave the Transclear paper insert in the special edition zines. It engraves beautifully, but the paper is thin (about 100 gsm) so it doesn’t lay perfectly flat on the bed. A small variation in distance from the laser-head is enough to create poor quality regions in the engraving. With an adhesive mat, I could probably solve this, but in the end, I decided to print these inserts instead.
Timelapse
Each cover takes about 10 minutes to engrave. Here’s a timelapse at 20x speed:
This post is part of a series covering the production of a photozine. Other posts in the series:
You can buy a copy of the zine here.

Leave a comment